17 Comments

Furry Friend

I think these puppies are so stinking cute!  I’ve had a set of rubber stamps mounted on foam called Doggies since, well… forever… that sadly had never been inked up.  I tripped over them… almost literally when a rack I use to hold stamps tipped over… and left them out on my desk to play with.  Take a look at what I made with them:

20140404postf@MisplaceMojo.com 20140404postfc@MisplacedMojo.com

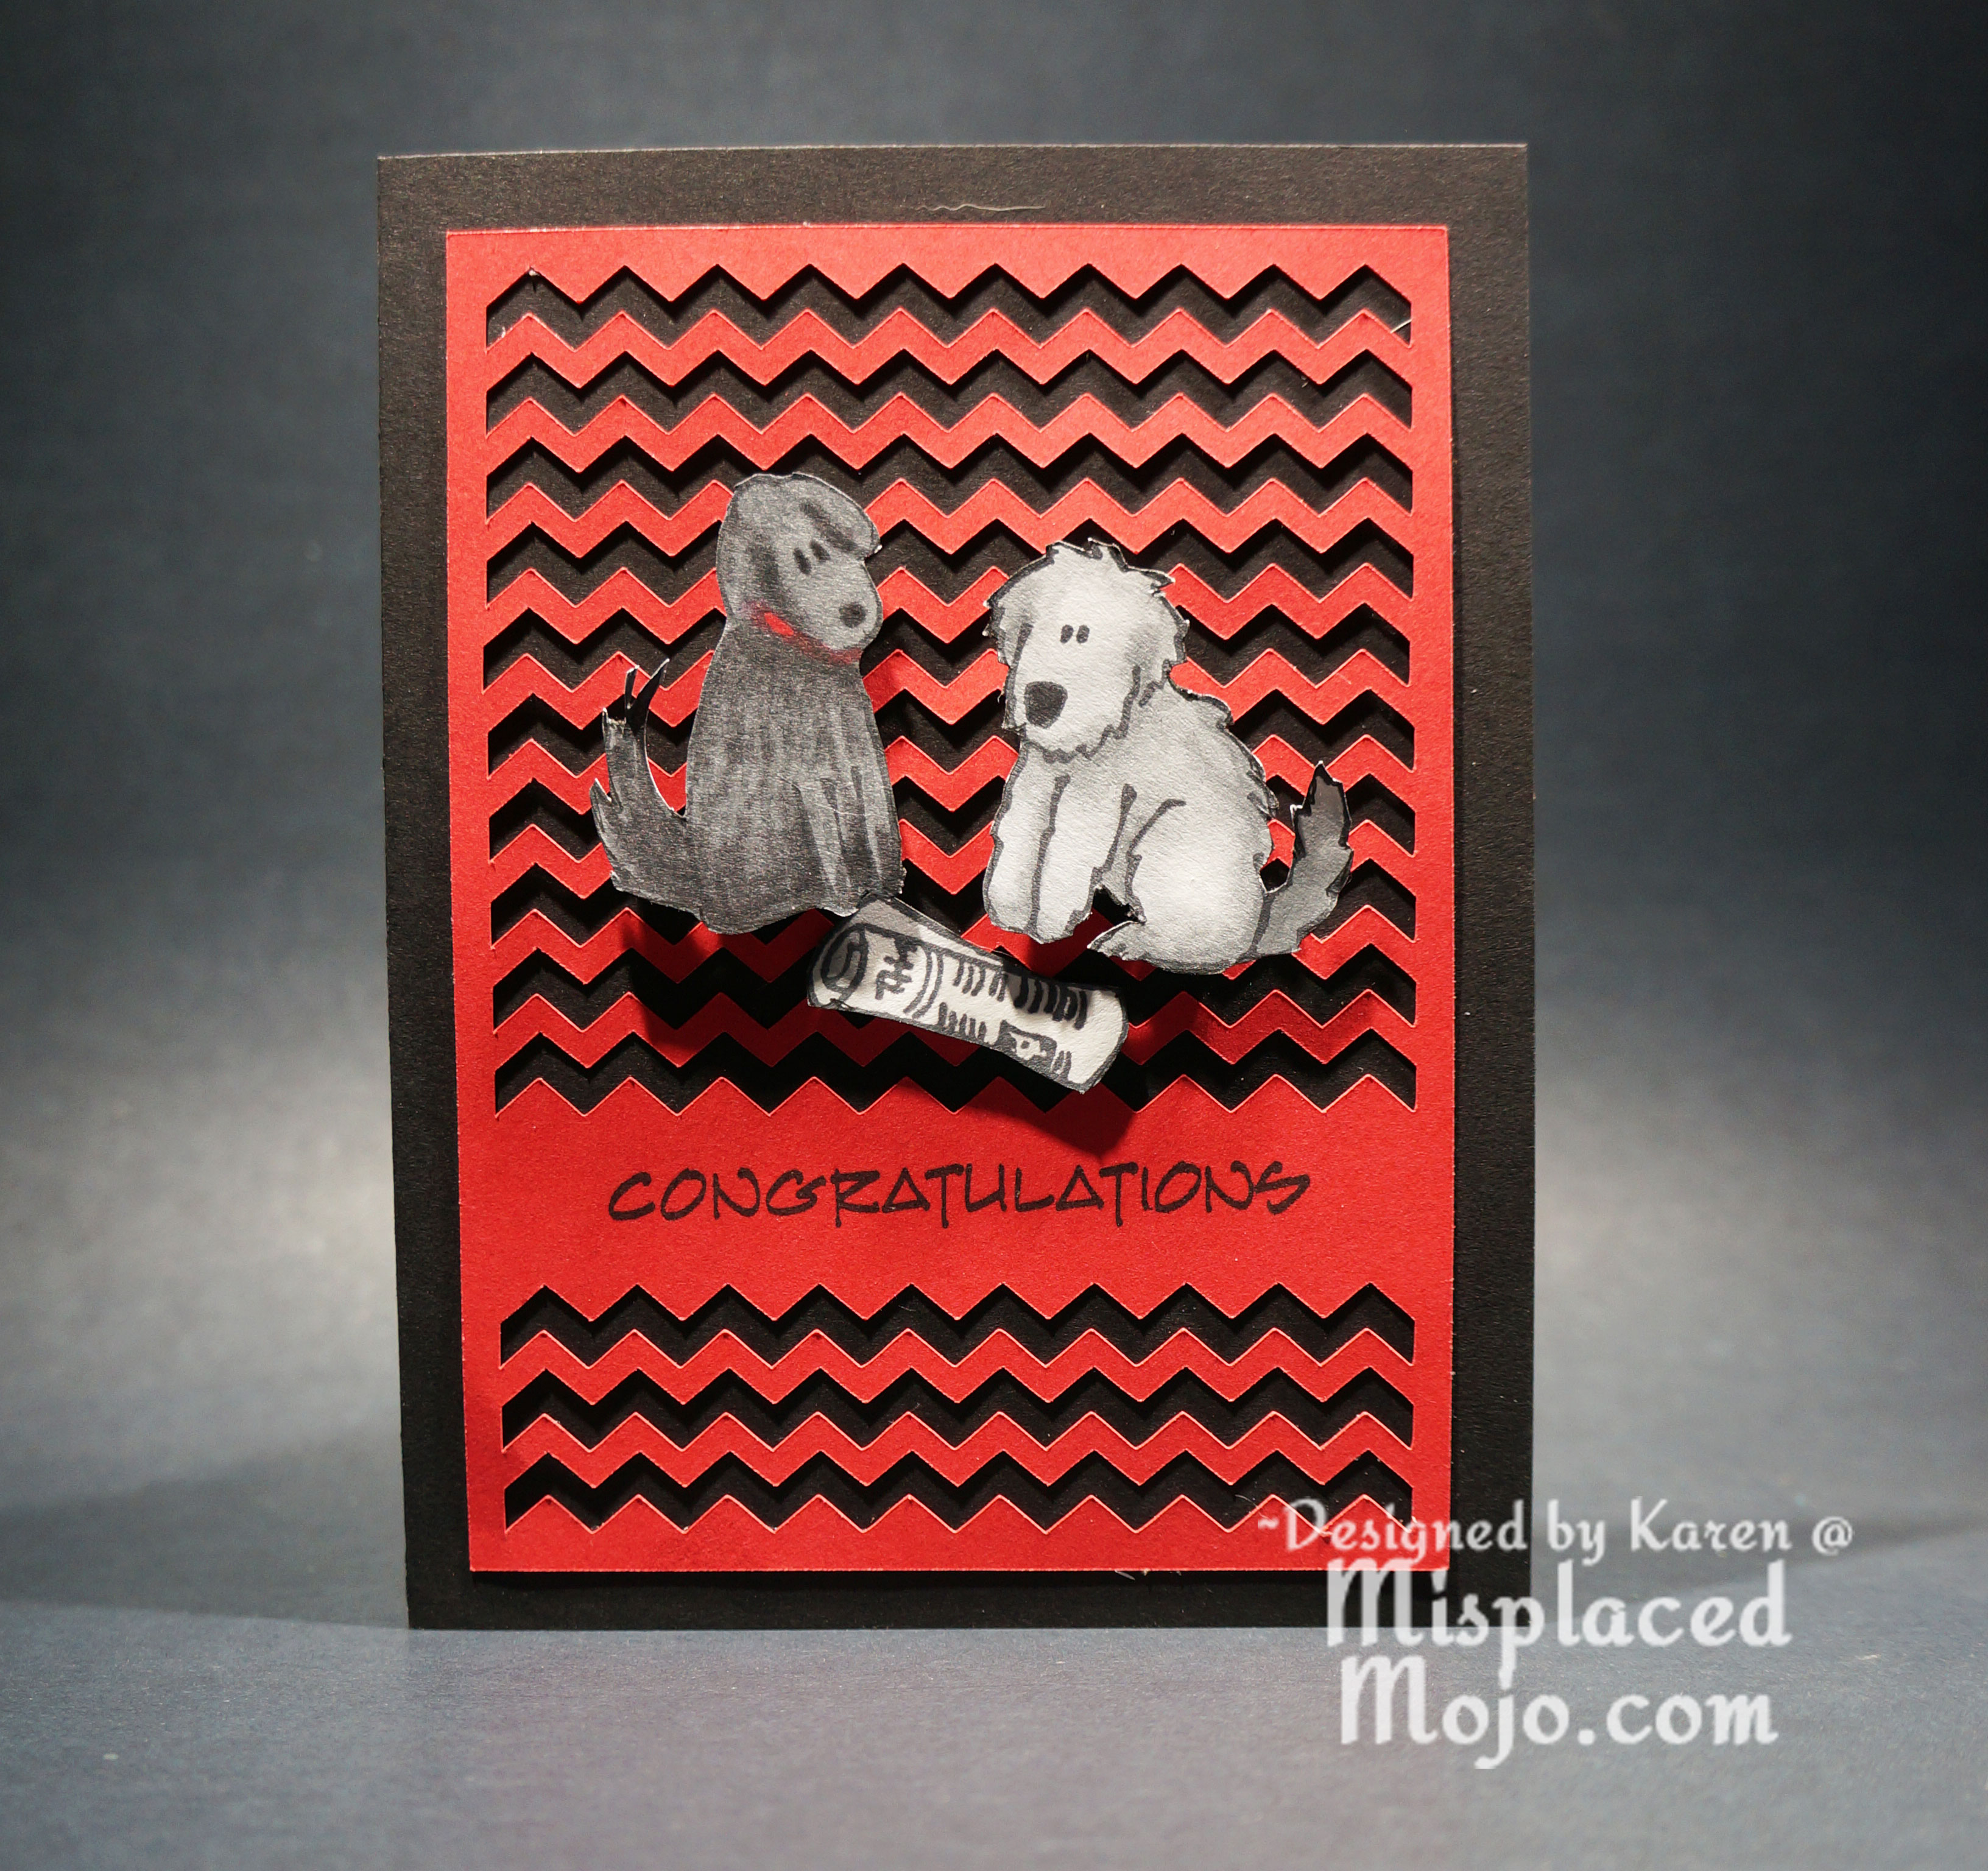
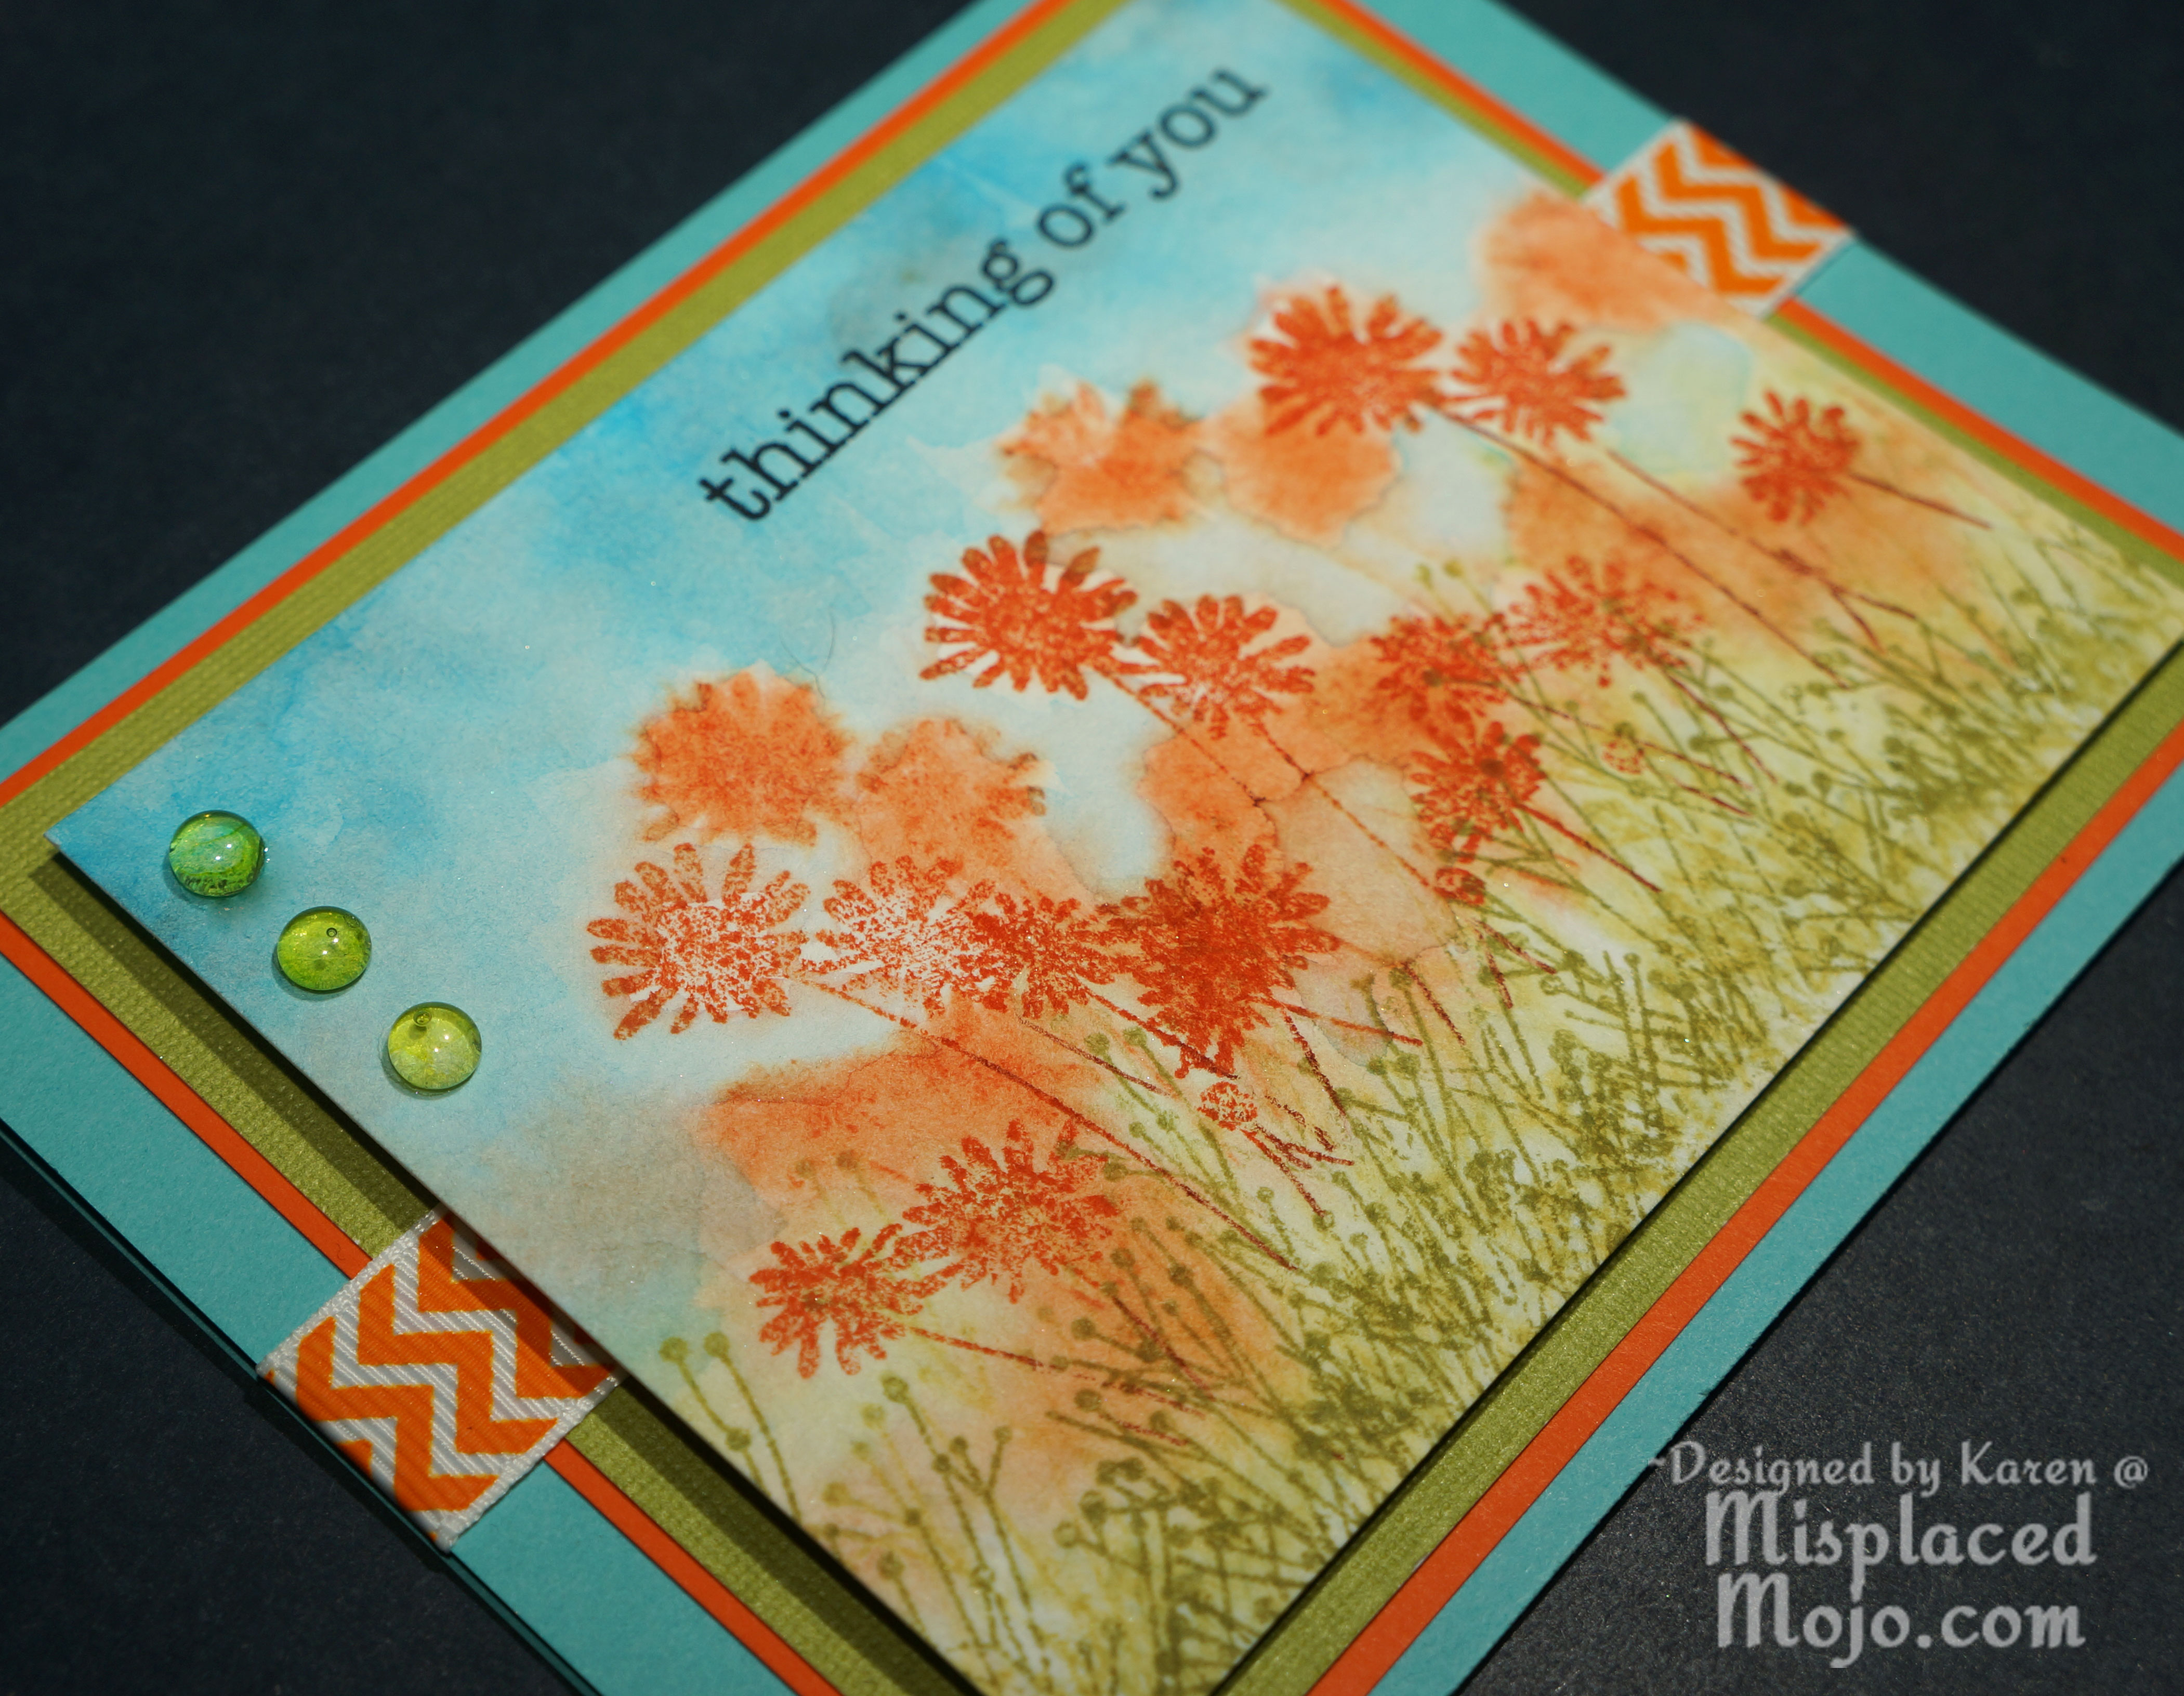
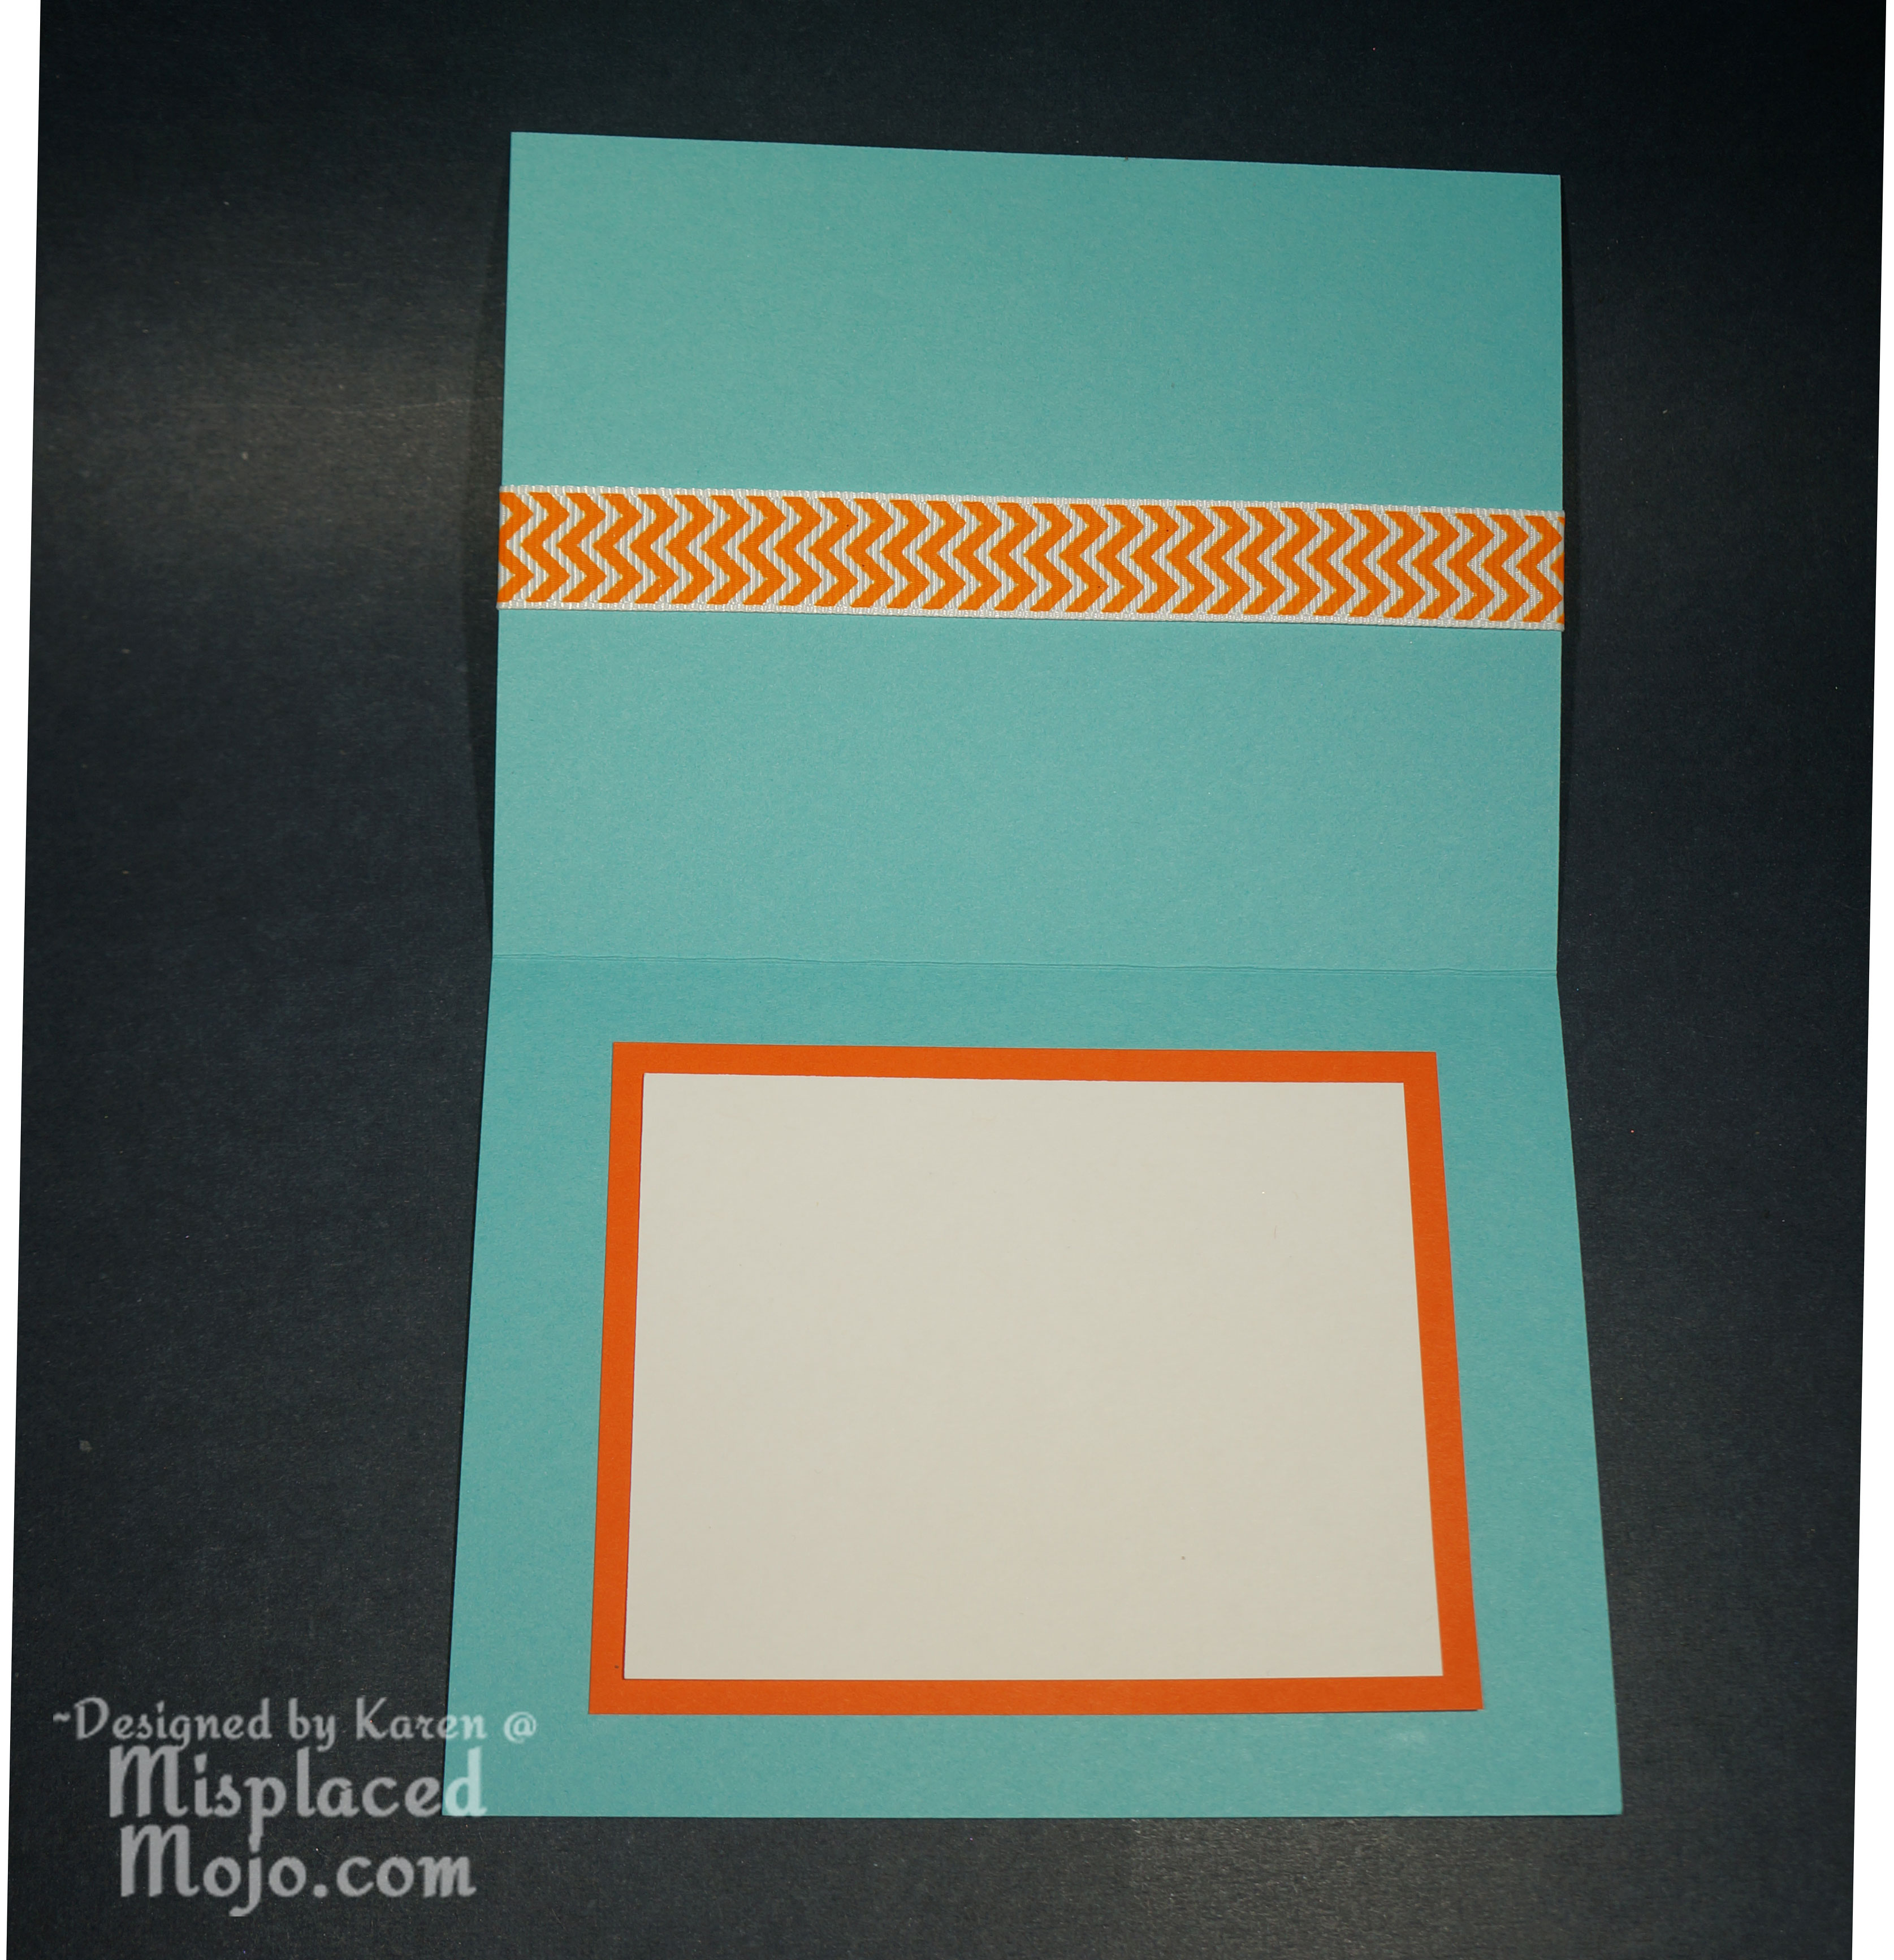
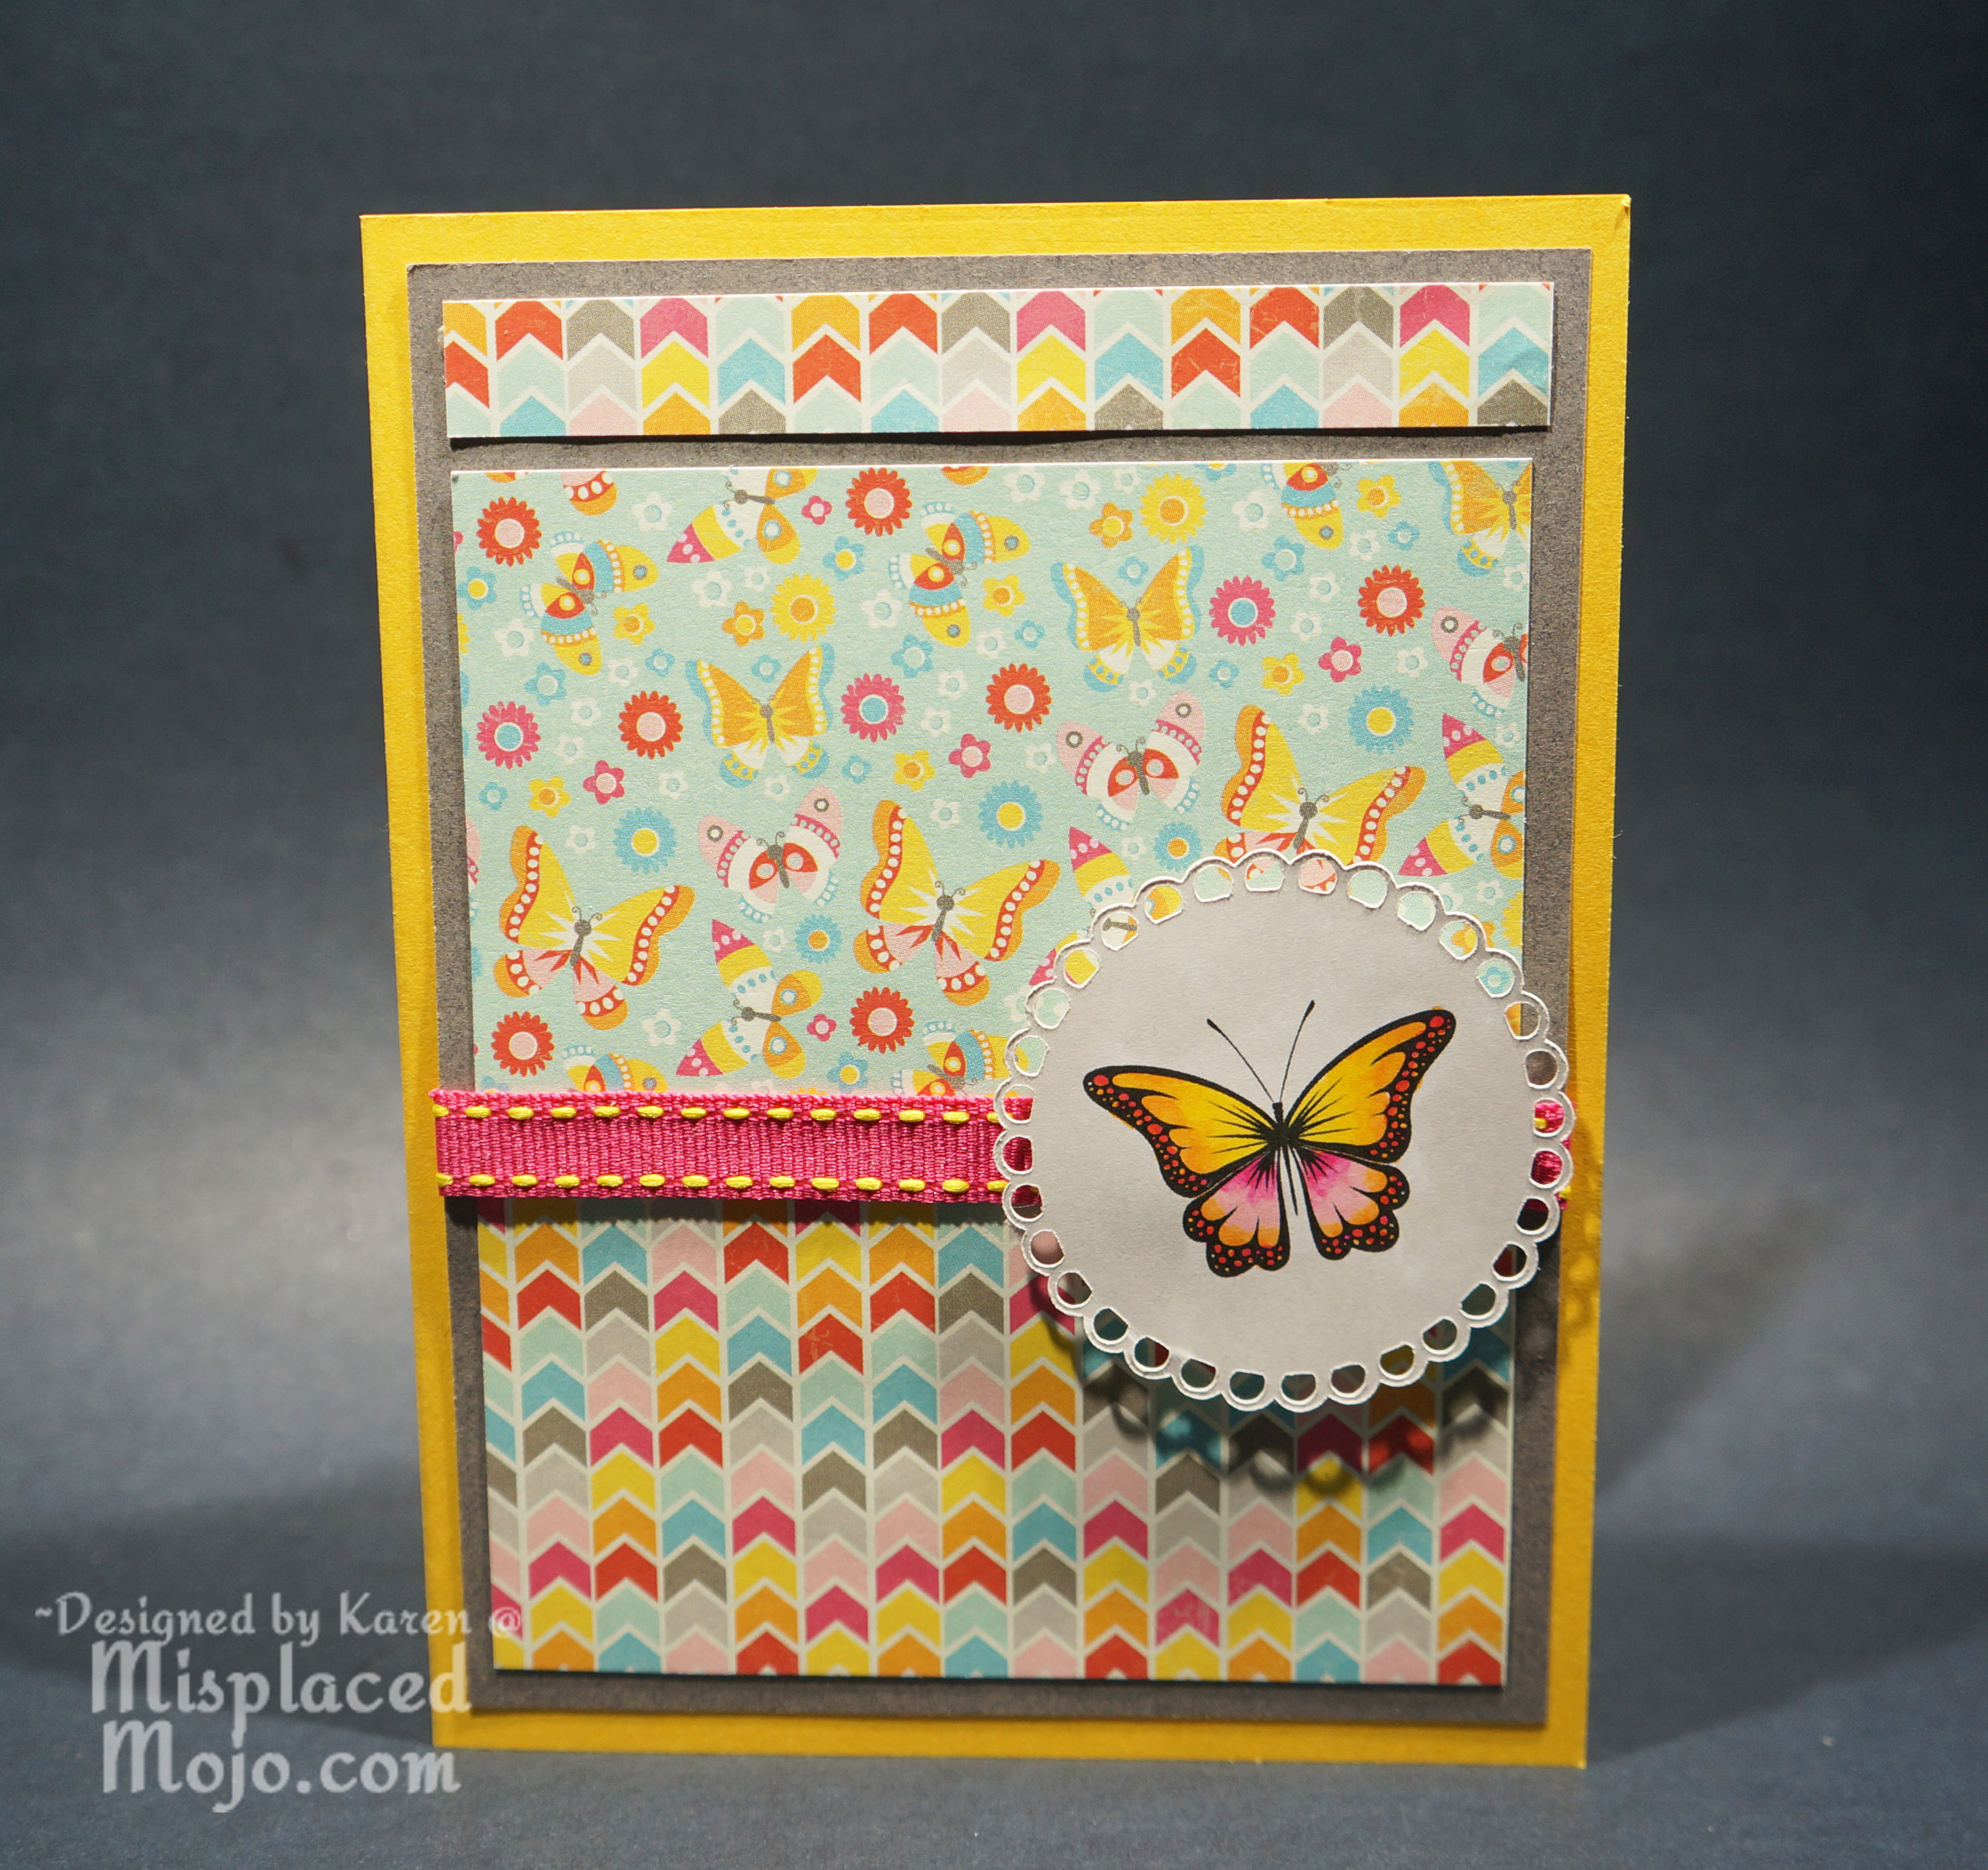
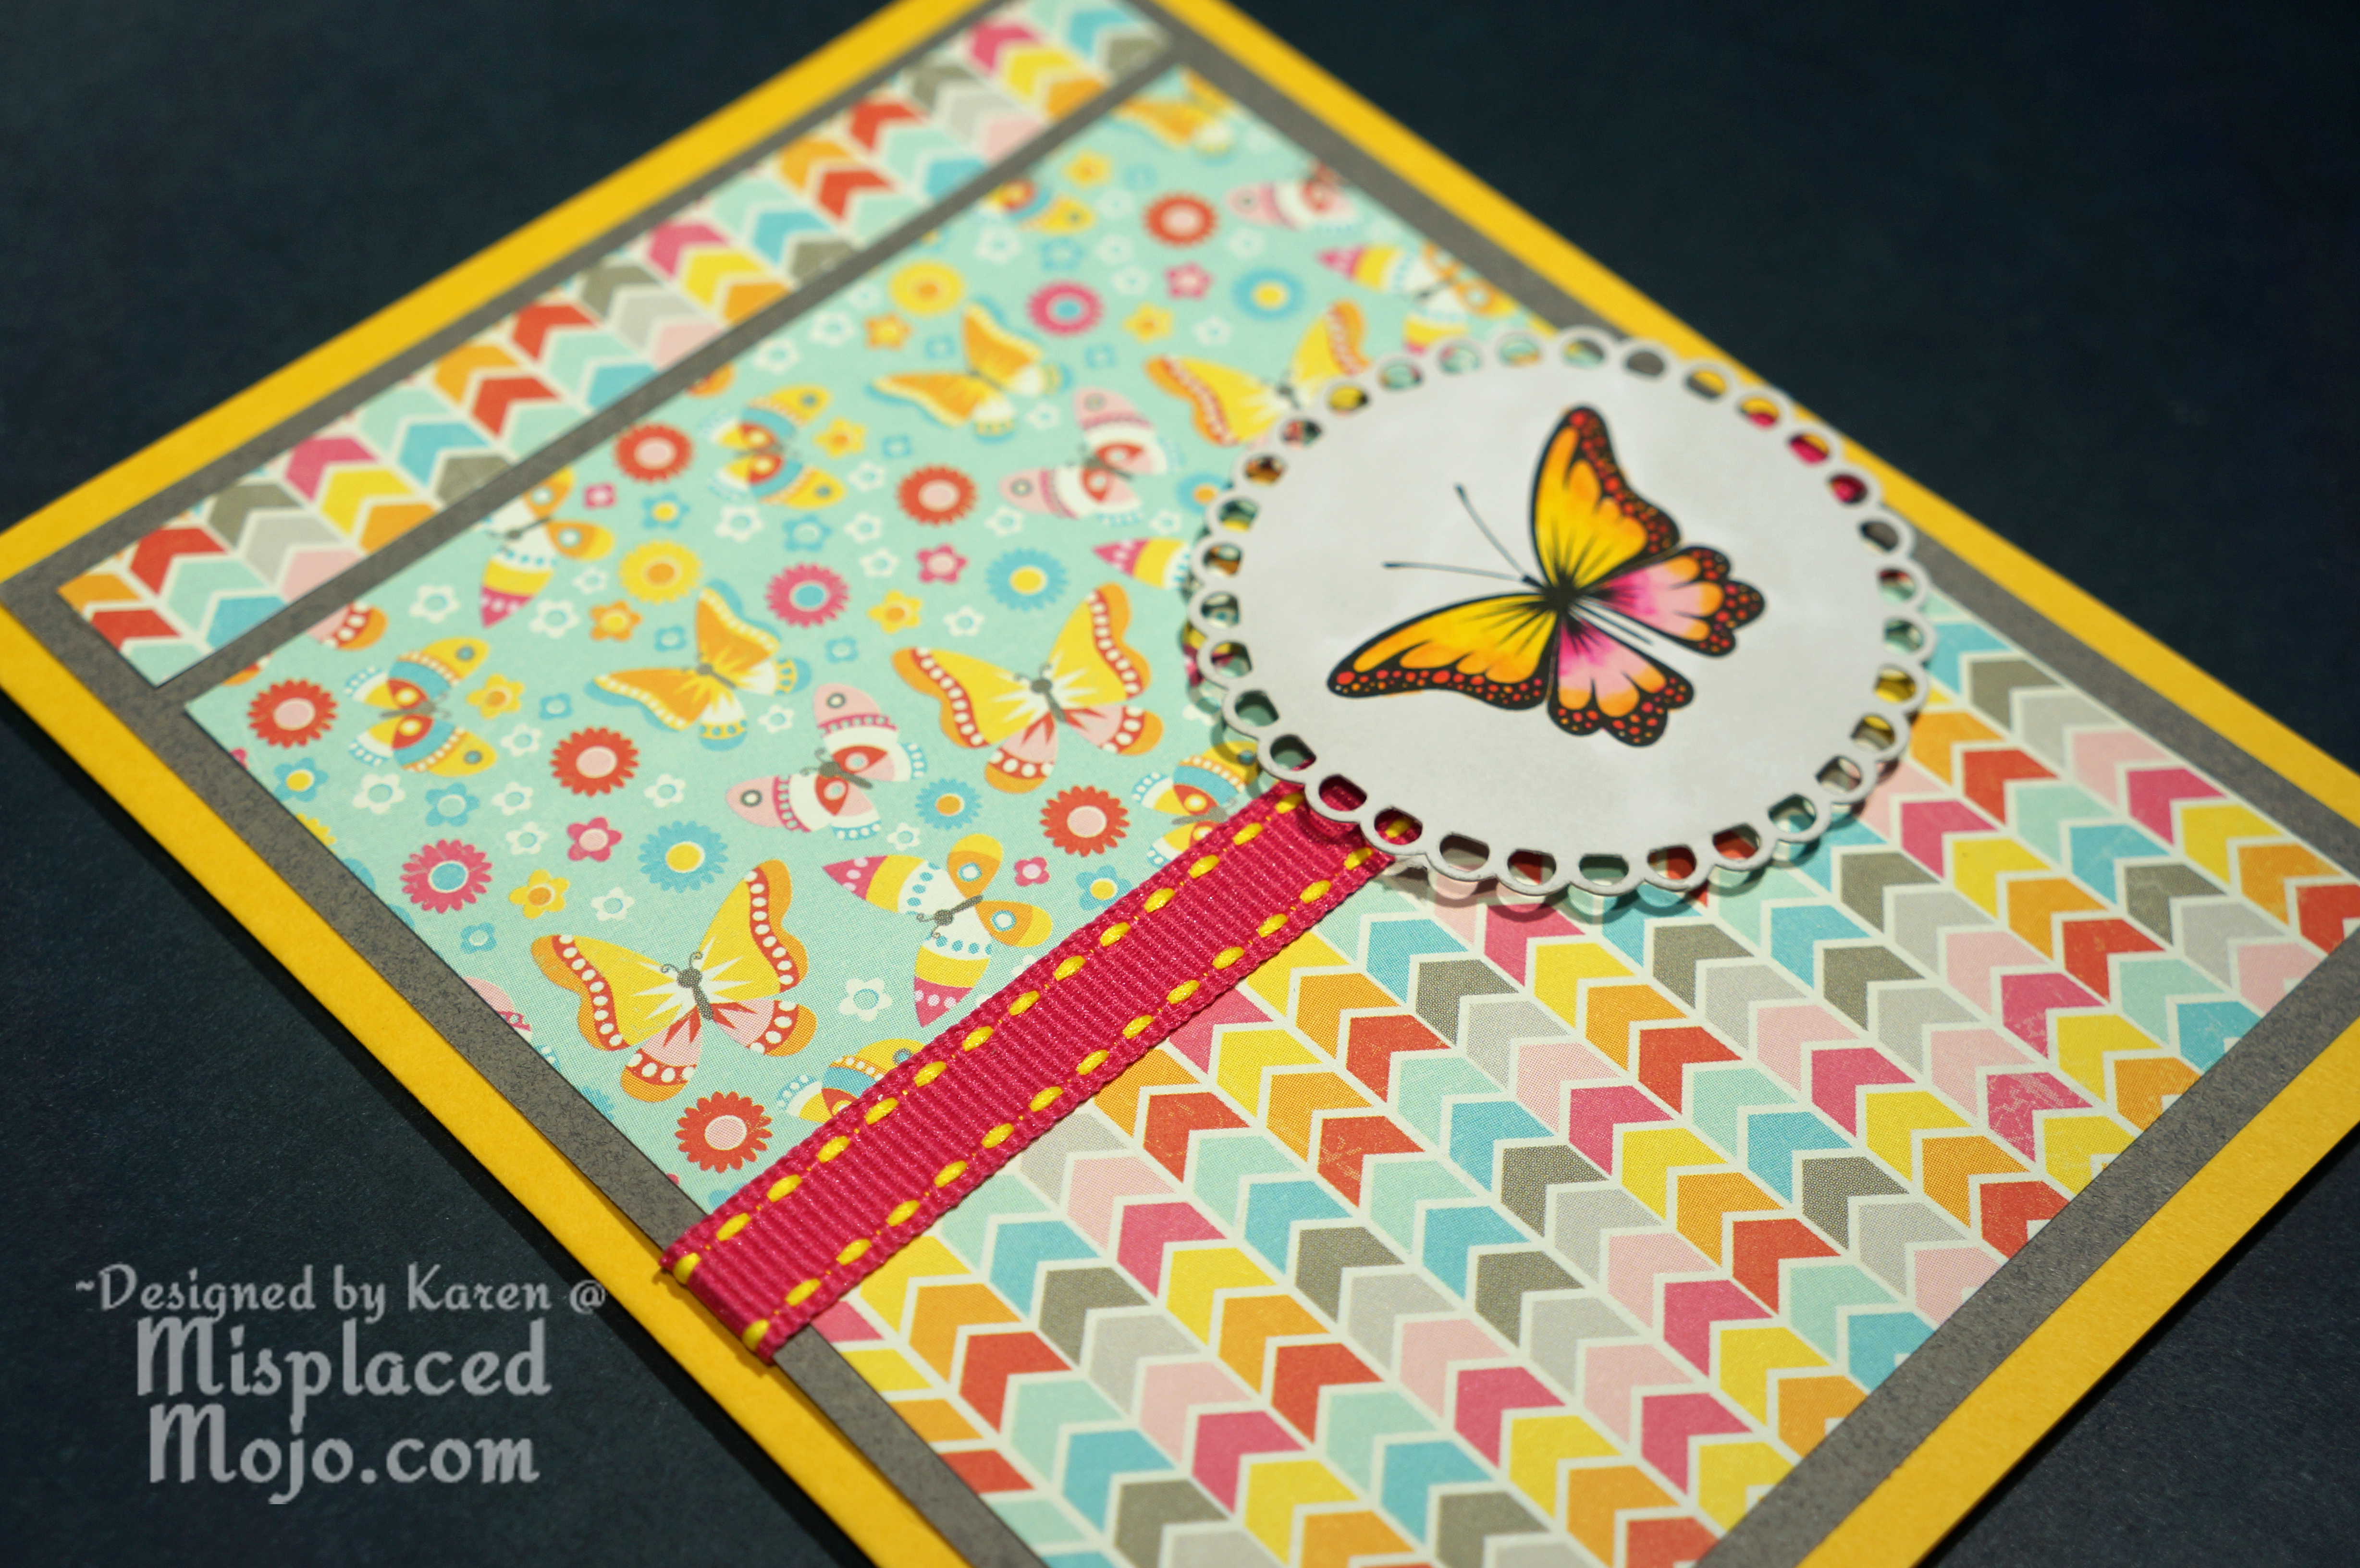
I should make time to color every day because I find it so therapeutic!  Anyway, all the stamped images are from that set, and were colored with Promarkers. I think I nailed the fluffy look I was going for with the one on the right, but I still need to learn to make fur more realistic.  The one on the left just looks stringy 😉  Didn’t help that I wanted him to look black too.  All the images were popped up on foam tape.  The background was made by repeating a chevron border cut file from the Silhouette online store.  I skipped a couple of the lines to leave space to stamp a sentiment.  I went with “Congratulations” so I could use the card for a friend adopting a dog.  What does it say that within my circle of friends that they are SO much more likely to adopt a dog than to have another baby?!?  It says I’m getting old!!!  hehe!  Here’s a look at the inside:

20140404posti@MisplacedMojo.com

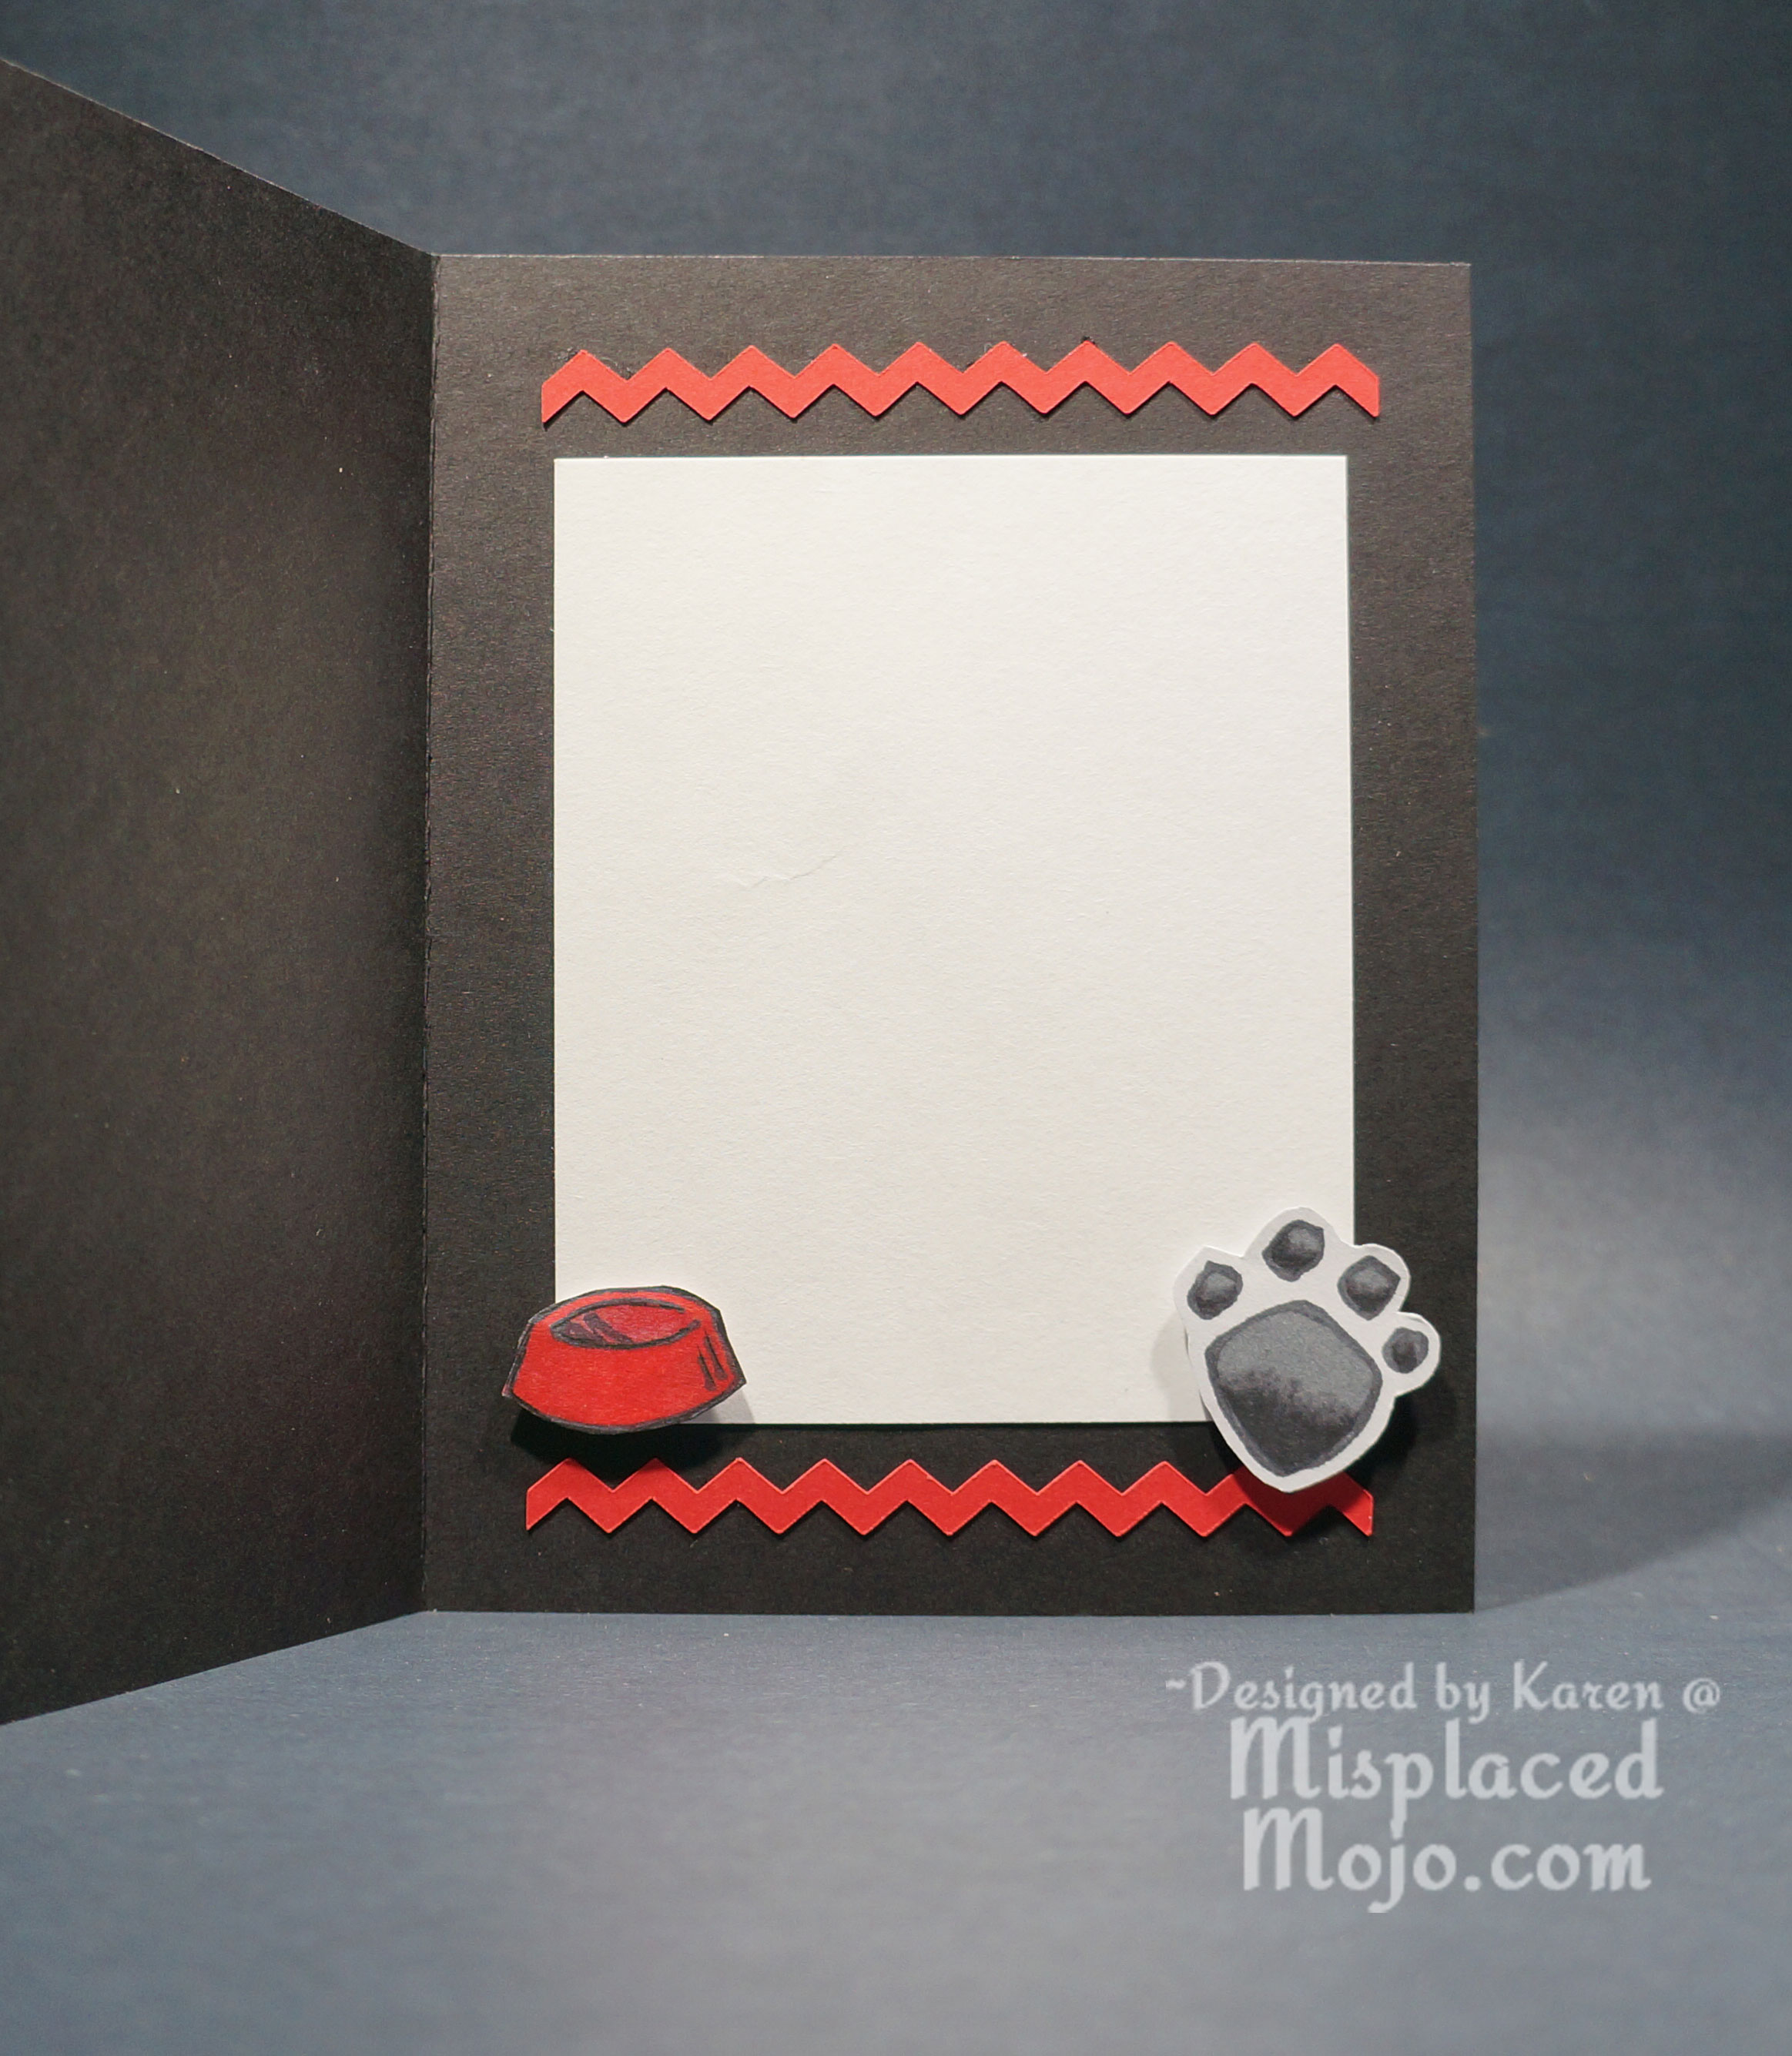
I used a couple chevrons from the front to decorate the inside, as well as a couple more colored stamps.  I think the color combo works great as a masculine card, but the chevrons add enough design flair to make it work for a woman too.

I am submitting this card to the following challenges:

Blog Signature copy


15 Comments

Best Wishes Butterfly

Most of the northern hemisphere of the world is desperate for Spring to kick in.  Where I live, we’ve been enjoying mild temperatures for a couple weeks, but am only just beginning to see signs of life and color returning.  Here’s a burst of sunshine and brightness for you!

20140404postf@MisplacedMojo.com  20140404postfc@MisplacedMojo.com

The flowered paper was made with a flower stamp from my stash (from before I started keeping track of manufacturers) and Memento Dandelion yellow ink. The bottom panel was embossed with a Darice folder called Dots.  The ribbon was a recent find at a HomeGoods of all places, but wasn’t a known brand.  I love the cheater bow I created.  Wide ribbon is so hard to tie and knot, so this worked like a charm!  The butterfly was purchased at a Scrapbook Expo, maybe 3 years ago.  I think I bought a dozen and have maybe used 3  😦  The banner was a cut file from the Silhouette online store and the sentiment was print and cut on it with a font on my computer called Frivolity.  I popped up the center portion with foam tape for dimension. Here’s the inside:

20140404posti@MisplacedMojo.com

I left the inside blank for now until I decide on the recipient of the card.  I used trimmings from the front panels to give the inside a little flair.

I’m submitting this card to the following challenges:

Blog Signature copy


6 Comments

Blueberry Butterfly Birthday

Say that 5 times fast! Blueberry Butterfly Birthday! Blueberry Butterfly Birthday! Ok, perhaps I’m getting a little giddy since I was able to finish off another half finished project laying on my desk. Take a look:

20140325post2f@MisplacedMojo.com 20140325post2fc@MisplacedMojo.com

I know… very purple, right? Definitely not my go-to color, but there it is anyway 🙂  In fact, the older I get the more I figure out that I don’t really have a go-to anymore!  So, this one is super simple… this sweet little butterfly is from Meljen’s Designs and was colored with Promarkers.  The trail is part of the digi, but I added the same “stitching” around the edge. The mat was cut and embossed with a scalloped rectangle Spellbinders die.  The white border was embossed with the 6×6 Dots embossing folder by Crafters Companion. The patterned paper is from the American Crafts 6×6 Dots and Stripes pad. The card needed some pizzazz so I added bling to the circles in the trail of the butterfly and then to the card itself to give the whole thing some much needed sparkle.

DSC03006

The inside has just of the patterned paper, and the birthday sentiment is from Justrite Large Fancy Sentiments set.

I’d like to submit this card to the following challenges:

***Edited 3/27/14 – Whoo hoo! I won the prize at Passion for Promarkers for this card!!! ***

Blog Signature copy


10 Comments

Flying By to Say Hi – Hot Air Balloon

Happy Tuesday, all! I’m super glad to be posting today!  That dang mojo of mine has been playing hide and seek with me these last few weeks.  Between the misplaced mojo and life in general getting in the way a little, I haven’t had a chance to work on a whole card from start to finish in one sitting for weeks. I did however get 10 mins here and there, most of the time generating only pretty trash, but finally this weekend I was able to put some finishing touches on a few works in progress. So without further adieu, here’s what I’d like to show you:

20140325postf@MisplacedMojo.com 20140325postfc@MisplacedMojo.com

I know, doesn’t look like it took 3 weeks to put together, right? Ah, but I tell the truth!  The card base was solid white which I then inked with Memento Summer Sky ink using a torn piece of paper to simulate clouds. I then stamped the large balloon in Memento Tuxedo Black and the smaller balloons in Memento London Fog… both stamps are from the Hot Air set by Local King Rubber Stamps.  I stamped the large balloon again on Copic paper and colored that image in with my Promarkers. I fussy cut out the main balloon shape and the basket, glued the basket directly onto the card base, and popped the balloon part up on foam tape for dimension. This also kept the coloring from bleeding through to the inside.

The sentiment is from the Flying By set from Lawn Fawn.  The inside has just a hint of clouds and I left the rest blank to have room for a long note to the recipient. 🙂  The colors were too light for the camera to even pick up so I’m not even bothering to post a pic of the inside.

I am submitting this card to the following challenges:

***Edited 3/28 – I was picked as the Chic of the Week @ Jugs for this card!!! Yay!***

Blog Signature copy

11 Comments

Thinking Of You Watercolor

I have been a follower of Heather Telford at Bits and Pieces for quite some time. She makes the most beautiful watercolor cards with stamps and Memento inks.  My mojo has apparently been on vacation or in the Witness Relocation Program… so I decided to get inky and see if I could channel some of Heather’s talent. Yeah… not there yet.

20140324postf@MisplacedMojo.com  20140324postfc@MisplacedMojo.com

For this card I used several stamps from the Foliage #1 set from Artsy Fartsy.  The look is intentional, for those wondering if I was intoxicated while stamping.  The blurry images are meant to look like they are off in the distance while the sharper images are more in the foreground.  You create the blurred background by wetting watercolor paper and stamping into it while very wet.  The sharper images were stamped when the paper had dried some. You can get an in between look by inking your stamp and then spritzing it with water. I was much happier with the results of this before I went back in to “fix” a tiny little something after it had dried.  The effect of watercolor is unpredictable and any time you get too cocky for your own good, it teaches you a lesson in being happy with “good enough”.  I layered the image a couple times, stamped a sentiment from my stash, added some ribbon and dew drops and called it done.  Here’s a quick peek at the inside:

20140324posti@MisplacedMojo.com

My quick description of the process sounds like it went quickly, but I assure you it would have looked like creating in slow motion with time lapse photography over days time! Now I’m off to go look for my mojo… maybe I accidentally ran it through the wash! Better check the dryer lint filter. Ha!

I’m entering this card in the following challenges:

***Edited 3/29/14 – I was picked as one of the DT Top Picks at Come and Get It Challenges! 🙂 ***

Blog Signature copy

10 Comments

Metamorphosis

Today’s card is not my typical style, but the mojo was flowing so I tried very hard to go with it and not question it 😉  This card was inspired by this week’s sketch at Fusion Card Challenge:

20140226postf@MisplacedMojo.com 

The patterned paper is from My Mind’s Eye 6×6 pad called My Girl. The chevron design is the reverse of the butterfly paper.  Its brighter than I would normally make, but I guess with Spring right around the corner I am making more colorful projects. 🙂  The butterfly is clipart, which I imported into the Silhouette software and cut out using a scalloped cut file.  The image was colored with Promarkers and popped up on foam tape.  The white copic paper was too sharp a contrast to the patterned paper, so I colored the background with a Promarker too. The ribbon was from my stash… probably Target dollar spot, if I had to guess.  Here is a better view of the front:

20140226postfc@MisplacedMojo.com 20140226postfc@MisplacedMojo.com

For the inside, I used scraps from the front to match the front. Another clipart was cut with the Silhouette and colored with Promarkers. The digi sentiment was imported into the Silhouette software and cut with a label shape.  I love the sentiment by VIBGYOR Krafts… perfect for someone who is having issues and feels like it won’t ever get better. Here’s a closer look so you can read it clearly. You can click on any of the pics to make them larger.

20140226posti@MisplacedMojo.com DSC02906 20140226posts@MisplacedMojo.com

Thankfully I don’t know anyone in need of this card right now, but its nice to have it in my stash so I can send it out immediately when it is needed.  I’m submitting this card to the following challenges:

Blog Signature copy

12 Comments

Sending You Sunshine

I’ve been itching to make a shaped card but didn’t know where to start until I saw the weekly challenge at The Friday Mashup is Hexagons or Triangles.  Before Christmas, I just HAD to have the Spellbinders Hexagon dies, so it was time to break them in!

20140425postf@MisplacedMojo.com 20140225postfc@MisplacedMojo.com

I used the largest die for the card base and the smaller dies for each of the layers… including the sun.  It almost looks like a Minecraft sun 😉  If any of your kids (or husbands) are obsessed with the game like a certain 12 year old in my house is, then you know what I’m talking about.  This was also a perfect opportunity to use the Spellbinders embossing folder So Trendy with the hexagon pattern.  I added a border punched with the Fiskars Apron Lace border punch. I inked all the edges with Frayed Burlap Distress ink to help define the layers. The sentiment from Hero Arts was popped up on foam tape. I decided to hand cut the sunbeams to make the little hexagon look more sun-like.  🙂

20140225posti@MisplacedMojo.com

The inside was super easy. I just die cut the inside hexagon with two strips of the patterned paper and inked all the edges.

I’m submitting this card to the following challenges:

***Edited 3/3/14 – I was picked by the Friday Mashup DT as a Mashup Glamette for this card! 🙂  ***

***Edited 3/8/14 – I was picked by the Pile It On DT as one of their Top 3 Scoops for this card! 😀 ***

Blog Signature copy

14 Comments

Big Birthday Wishes

Howdy folks! Today’s card is bold, bright, and blingy!!! The inspiration for the layout is this week’s sketch from Techno Stamper.

20140218postf@MisplacedMojo.com

I was browsing through my 6×6 paper pads and Hip Hip Hooray by American Crafts was just begging me to use it today 😉  Now, I wouldn’t normally mix really bold papers, but I think it works on this one to tone down the intensity of the patterns. I could have used a solid for the middle band, but I really liked the look of a stripe from the same pad to separate the two other patterns. It was looking rather flat at that point, so I used Spellbinder’s Dahlia dies to create a four layer 3D flower. I wanted this card to be exceptionally girly, so I started adding bling to the flowers. I love the way it looks! (Believe it or not, this hardly made a dent in my stash of loose bling I picked up for cheap.  Of course, it was cheap because it didn’t have adhesive on the back, so all those pesky rhinestones were adhered with Ranger Matte Accents.) The sentiment was made with a Studio G stamp and the banner was cut with a Spellbinder’s Large Ribbon Banners die, which was then scored, folded, and popped up on foam tape. Some twine, a bright yellow button, and rounded corners finish off the front of this 6″ x 6″ card. Here’s a closer look at all that bling:

20140218postfc@MisplacedMojo.com 20140218postfcu@MisplacedMojo.com

The inside was much simpler.  The birthday stamp is from Just Rite Sentiments. A little of the stripe paper and another Dahlia flower ties it all together!

20140218posti@MisplacedMojo.com

This is by far the most girly-girl card I’ve ever made. What do you think? Would a 13 year old girl like this???

I’m entering this card in the following challenges:

***Edited 2/25/14 – This card was picked as one of the Top 3 at Techno Stamper!***

Blog Signature copy

13 Comments

100% Adored

Just a quick CAS card for Valentine’s Day featuring Impression Obsession stamps.

20140214post3f@MisplacedMojo.com 20140214post3fc@MisplacedMojo.com

The tree is from the Solid Tree stamp set, but instead of using the leaves from that set, I used the heart from the Love Seals stamp set. The medallion sentiment on the front is from that set too, which was then die cut with Spellbinders Lacey Circles. This card went together quickly with the stamping and sponging on the focal image. Here is what it looked like before the Stickles:

20140214post3fo@MisplacedMojo.com 20140214post3i@MisplacedMojo.com

I added a little panel embossed with the Cuttlebug folder called Seeing Spots. It seemed like it needed a little something, so I added a few pieces of Card Candi. Good thing they don’t have calories cause I might just be addicted to the candi! The inside uses more of the embossed red cardstock with a sentiment from my stash of moldy oldie wooden stamps.  Such a pretty font… shame it can only be used for one occasion.  *sigh*

I am submitting this card for the following challenges:

***Edited 2/25 – I was featured as a Design Team Favorite by Nana Connie at Open Minded Crafting!***

Blog Signature copy

8 Comments

Kissing Chameleons

OK, so I know I already made a card for my hubby, but this might have to replace it and save that one for our anniversary.  I am loving these sweet little chameleons from Elizabeth Dulemba! Look… they are making a heart with their tails!!!  Stinkin’ cute!

20140214post2f@MisplacedMojo.com

I uploaded the image into the Silhouette software so I could neatly cut the image out.  I colored them up with Promarkers and then  used Diamond Glaze on their eyes to make them shiny and dimensional.  I layered the image on a heart cut with the Silhouette. The black paper was embossed with the Houndstooth eBosser folder.  The gray strip behind it was embossed with the Cuttlebug Mesh folder. I wanted the focus on the image, so I kept the front clean and simple, but added Card Candi to the corners to frame the image. Here’s a closer look at those glassy eyes:

20140214post2fc@MisplacedMojo.com 20140214post2fcu@MisplacedMojo.com

And here is the inside:

20140214post2i@MisplacedMojo.com 20140214post2ic@MisplacedMojo.com

The S.W.A.K. stamp is from the Love Seals set by Impression Obsession, and was layered using a Spellbinders Inverted Circle die.  The Valentine sentiment is an old wooden stamp from my stash. And just like that, its done.  Yup, I think this is the one I will give my hubby!

I’m entering this card in the following challenges:

I’m also linking up with Elizabeth Dulemba’s gallery.

Blog Signature copy

9 Comments

Tons of Love

Check out this sweet Valentine’s Day card!  Too cute 😉  I love this image from Dustin Pike at Doodle Dragon Studios.  I thought it would make a great card for my son… hope its not too cute for an almost 13 year old!  I think certain occasions justify (if not require) cute… don’t you?!?

20140214post1f@MisplacedMojo.com

This card was inspired by the sketch this week at the Techno Stamper. The black background was embossed with the Houndstooth embossing folder, and the red strip was embossed with the Dotted Chevrons folder, both by eBosser.  The sentiment was made using the Silhouette, with tiny hearts replacing the holes in the o’s of the words.  The image was imported into the Silhouette software, traced, and cut with an offset.  I then colored the sweet elephant with Promarkers.  I finished off the front with a little Card Candi. Here’s a close up:

20140214post1fc@MisplacedMojo.com 20140214post1i@MisplacedMojo.com

The inside is simple… another sentiment made with the Silhouette, a few hearts to tie in the ones on the front, and a scrap of the embossed black paper. Viola! Done!

I’m entering this card in the following challenges:

Blog Signature copy

7 Comments

Forever Love

Hello everyone! (Well, except my husband… Remember?  You promised you wouldn’t read today’s post until Friday!)  Guess what y’all, I finally found my mojo again… it was hiding in the laundry basket this time.  Nothing like needing to do 5 loads of laundry to make you want to craft!!!  I had been thinking all week about how to do this week’s sketch from Mojo Monday and ideas of any kind evaded me until today when it came together in less than an hour from scratch. Check it out:

20140209postf@MisplacedMojo.com 20140209postfc@MisplaceMojo.com

Valentines Day cards are hard for me because neither my hubby nor son appreciate the pink, frilly cards that would be so easy to make. In fact, I’m sure this card has way more pink than any guy would like… and one too many bow!  😉  I tried to counter that with embossing and metal so the focus would be on the textures more than the colors.  The red mat is embossed with the Honeycomb folder by eBosser.   The pink is embossed with the Trendy folder from Spellbinders.  The sentiment is actually an embossed metal sticker from my stash… maybe from 6 years ago (yikes). Speaking of old, the paper is from the first stack I ever bought, a holiday pack I can no longer remember the name or maker of its so old!  The charm however, is a recent acquisition from Oriental Trading Company.  You’ll be seeing a few styles of these in the coming months!  The hearts were die cut using the Silhouette, and popped up on foam tape.  I also embossed lines around the edge of the card with a score board. The organza ribbon loops the whole card front by sliding through a tiny slit in the fold line.  When I can’t wrap the ribbon around the layers, I do it this way. Here’s a look at the inside so you can see what I mean:

20140209posti@MisplacedMojo.com 20140209postic@MisplacedMojo.com

The strip of cardstock was embossed with the same Honeycomb folder.  The main stamp is from Just Rite’s Large Fancy Sentiments set. I can’t remember what set the XOXO is from, but I liked the way it looked. I couldn’t find my valentines stamps, so the holiday sentiment will be handwritten along with the rest of my personal message. I will spare you all the sappy ramblings of a woman who is still deeply in love with the same man after 20 years 🙂

I’m off to submit this to the following challenges:

Blog Signature copy

5 Comments

Wish You Were Here

Today’s card is for my BFF, who I’m missing terribly lately.  We met in FL when our kids were only a year old & became good friends, then I moved 600 miles away a year later & we became best friends.  Come to find out we were in Kindergarten together… same class.  Freaky, right?  We see each other every summer, but that’s never enough. She’s the best friend anyone could ask for! 🙂 Besides just missing her, we got snow here in GA and I wish she was here to enjoy the winter fun!  I could have used snowflake paper & embellishments, but there was no sense rubbing it in, right?!?    ***Not sure why, but today the pics loaded all grainy looking though they aren’t in real life.  I’ll try to re-do them later and update.***

20140129postf@MisplacedMojo.com 20140129postfc@MisplacedMojo.com

I used the sketch from Deconstructing Jen for the layout.  The papers are from a Studio Calico 6×6 pad called Here and There.  I made the sentiment using the Silhouette software and one of my favorite fonts, Algerian, then just did a print and cut.  The arrows were also cut with Silhouette.  I snipped the banner layers freehand, and used a Spellbinder circle die to cut the half circle.  Foam tape and a few pieces of Card Candi gave it a polished look.

20140129posti@MisplacedMojo.com  20140129postic@MisplacedMojo.com

For the inside, I used a strip of the patterned paper, another sentiment made on the Silhouette software, the scrap from the banner on the front, and more Card Candi (originally white but colored with Promarkers to match the card).  Now for writing in it while I’m still feeling all sappy 😉

Then I’ll email her pics of us playing in the snow  :-p

I’m entering this card in the following challenges:

Blog Signature copy

14 Comments

Cake Inferno (Happy Birthday Bob!)

My brother is 12 years older than me.  I’d tell you that he’s older than dirt, but that makes me sound old too!  Instead, I will let this cake inferno hint that he’s no spring chicken 😉  I’m not feeling too young myself these days!!!

This card is different from anything else you’ve seen me do… a one layer card (gasp!). Normally I’d love to layer it up but this time is different.  I have been playing with watercolor (both paints and pencils) for a couple months now and really wanted to try it on a card.  Now, before you start thinking I’ve got talent or anything, please know that I totally did not draw this cake.  This fabulous illustration is by Elizabeth Dulemba, author/ illustrator extraordinaire, who is one of my favorite sources for digi stamps.  She releases them as free coloring pages, but crafters are using her images for papercrafts too.

20140126postf@MisplacedMojo.com  20140126postfc@MisplacedMojo.com

I printed the image, then traced it onto watercolor paper using an Artograph Light Pad. I got it for Christmas (an awesome surprise present) and it is so cool and easy to use.  I used my new Inktense watercolor pencils (another Christmas present… thanks Santa!) to trace, color and paint the image.  I hope Elizabeth doesn’t mind but I omitted the flower rosettes she had in the original image.  Following the sketch at CAS(E) this Sketch, I stamped a simple birthday greeting.  It felt like it needed something else, so I added some doodling around the edges with the help of a ruler.

20140126posti@MisplacedMojo.com  20140126postic@MisplacedMojo.com

I stamped an appropriate sentiment on the inside (cute, right?), but again could not leave it alone.  I doodled lines and dots to match the front of the card.  So, what do you think???  And can you believe I didn’t use the Silhouette for this one?!?

I’m entering this card in the following challenges:

I’m also linking up with Elizabeth Dulemba’s gallery.

Blog Signature copy

11 Comments

Birthdays and Donuts

Mmm…… donuts. Oh, hi everyone!  Don’t mind me, I’ve had donuts on the brain ever since I came up with the idea for this card 😉  My dad has had more birthdays that he would care for, but definitely not as many donuts as he’d like, so I’m thinking this birthday card will bring a smile to his face!

20140124postf@MisplacedMojo.com   

I used the sketch at Just Add Ink as a starting point as the sketch lends itself well to the donuts 😉  though I had to stretch the sketch to be landscaped rather than turning it so I could still accommodate the sentiment part of the sketch. The outside sentiment is from Paulette over at Create With TLC.  She has some of the funniest sentiments! I cut the sentiment out with Spellbinders Deckled Rectangles because it makes me think of icing.  Then again, I just like to think about icing!  Ha!  The donuts were printed and cut using the Silhouette and colored using Promarkers. I thought about using Diamond Glaze on the icing but I’m not sure I have enough time for it to dry before it has to be in the mail. The ribbon was tinted with a Promarker too.  Here’s a look at the inside and a close up of the yummy, er I mean colored donuts.

20140124postfc@MisplacedMojo.com  20140124posti@MisplacedMojo.com

I’m entering this card with the following challenges:

I’m also linking up for Show It Off Sunday at Create With TLC for using one of Paulette’s digis.  Now, off to go get some donuts!!!  🙂

Blog Signature copy

10 Comments

With Sympathy

OK, I am still rocking the color combo I used on my last card, and I used the scraps from that card to make this one.  Sweet, right?  Fortunately, I don’t have an immediate need for a sympathy card… just wanted to make one to have on hand if ever needed.  Last time my hubby asked me to whip one up it was like the craziest week and sadly I forgot all about it until he had already left for a business trip.  Now, at least I have one stashed away as an insurance policy.  And I don’t know about you, but when I am planned for an emergency, one never happens, so… the population in my little part of the world is going to explode since no one I know or know of will die anytime soon.  At least as long as I remember that I have a sympathy card in my stash!  If you are one of my family or friends you might want to remind me often!  Ha!

20140122post2f@MisplacedMojo.com 20140122post2fc@MisplacedMojo.com

So the color combo was inspired by the Just Us Girls color challenge, just like yesterday.  The sketch was from Seize the Sketch, but unfortunately I was still working off of last week’s sketch without realizing it.  Boo-hoo!  The flowers were cut from the Spellbinders Blossom set and curved using a McGill flower embossing stylus.  The banner was stamped with the same border stamp from the last card.  The  beautiful sentiment is from the sentiment set from Just Rite.  I distressed the edged of the mats just a bit.  Odd tidbit… the dot patterned paper was a scrap left over from a baby book I made a friend years ago.

20140122post2i@MisplacedMojo.com

The inside used a couple more coordinating scraps and another sentiment from the Just Rite set.  Hands down, that has been the most versatile stamp set I have ever purchased.  So happy with it, so expect to see it again soon!

I am submitting this card to the following challenges:

Blog Signature copy

9 Comments

It’s Your Day

Today’s first card was inspired by the challenges at Just Us Girls (for the color combo) and  Mojo Monday (for the sketch).  What an easy sketch to work with!  I have 2 birthday cards I need to be working on, and I’m not sure this will get used for either one, but I was aiming for a masculine card and the color challenge at Just Us Girls made that an easy decision.

20140122postf@MisplacedMojo.com  20140122postfc@MisplacedMojo.com

The stamps are part of the Hero Arts sentiment set and the sentiments were cut out using Spellbinders circle dies.  I cut the words apart for the sentiment on the front so I could position them stacked instead of in a line.  They fill the circle so much better than a single line across the middle would do.  The blue and white strips were stamped with a border stamp in coordinating colors.  The circle and rectangle were pierced with the Stampin’ Up Essentials Paper Piercing templates.  If you ever tried to pierce evenly and you don’t have this yet, you need to get it!!!  I cut a 1/2″ circle and small star with the Silhouette and mounted it in a blank metal brad.  A couple silver brads finished up the front of the card.

20140122posti@MisplacedMojo.com 20140122postic@MisplacedMojo.com

The inside is another Hero Arts sentiment on paper pierced circle, with coordinating stamped border.  The stack of presents is an old Studio G $1 stamp… I thought it dressed up an otherwise simple inside.

I am linking up this card to the following challenges:

Hope you check out some of these challenges to give your mojo a kick start!  For a more comprehensive list, check out the menu tab at the top of the page for even more challenges.

Blog Signature copy

Leave a comment

Birthday Blast

It’s the 1st challenge of 2014 at Fusion Card Challenges.  Their concept is totally cool… they provide both a sketch and photo inspiration… you choose to use the sketch, or the photo, or a fusion of both!  Fun, right?  Check out what I had to work with and what I came up with:

bedroom 20140109post@MisplacedMojo.com

OK, so my son is attending a birthday party for a 13 year old at a place called Tanktown where they will get to ride in a real tank and watch the tank crush a car, ride in a military Humvee, and then play paintball.  I knew I would have to match the card to the theme once I heard all about it!  To make the 3 blast sentiments on the front I had to modify the sketch to some degree.  Hopefully it’s close enough!  The orange blasts and black and white base tie in nicely with the photo (thanks Sharon for the color input!).  The tank and blast die cuts were from the Silhouette store, though I changed the font of the words. I also tilted the letters the way I liked them and welded them together to make gluing easier. Here’s a peek at the inside:

20140109posti@MisplacedMojo.com 20140109postc@MisplacedMojo.com

I made the birthday sentiment using the same font I used for the front. I turned off the cut lines for most of it to make it a print and cut panel, though the word “blast” was actually cut out for dimension.  And isn’t the tank cool?  I resized some of the blasts to lead the eye to the sentiment and I love how it turned out.  I know the card is for a teenage boy who will act like he doesn’t care about the card (only the ca$h in it!) but I think he will really like even if he won’t admit it!!!

I am entering this card in the following challenges:

Blog Signature copy

6 Comments

Happy New Year… take 2!

Does this look familiar?  No, its not either Groundhog Day or that you are seeing the same card as yesterday.  OK, so it bears a close resemblance!  When I printed off this cute little pre-colored digi and papers by Doodle Pantry, I did it a couple times in different shapes and sizes.  The 1st you saw yesterday with the image in a circle.  This time I put it on a rectangle using the Silhouette software to layer the bird on coordinating digi paper that came with the file.  And for this card, I used the new sketch at Mojo Monday for the layout:

mojo32720140108post@MisplacedMojo.com 20140108postf2@MisplacedMojo.com

I used the Silhouette software to trace the confetti of the image to make a cut file for the embellishments.  Gotta love how versatile your images can be with the Silhouette!  I used Stickles to sparkle this version of the card up!  What do you think, does this one have more pizazz?  Here are some close ups:

20140108postc@MisplacedMojo.com 20140108postcu@MisplacedMojo.com

I’m entering this card in the following challenges:

Blog Signature copy

6 Comments

Happy New Year!

OK, so I’m about a week late with this greeting. That’s OK. My friends and family come to expect this from me 😉 So no one will mind getting a Happy New Year card from me mid-January! See folks… set their expectations low and they are pleasantly surprised when I’m only a week late! Ha!

This cute image is a pre-colored digi from Doodle Pantry, and the papers are also included in their digi file. It was easy peasy to import into the Silhouette software and design the card layout to match this week’s sketch from the Sweet Sunday Challenge.  Especially easy since the sketch is pretty straightforward:

SSSC201 20140107post@MisplacedMojo.com 20140107postc@MisplacedMojo.com

Hope you like it, cause I have a new and improved version to show you tomorrow!

I’m entering this card in the following challenges:

Blog Signature copy