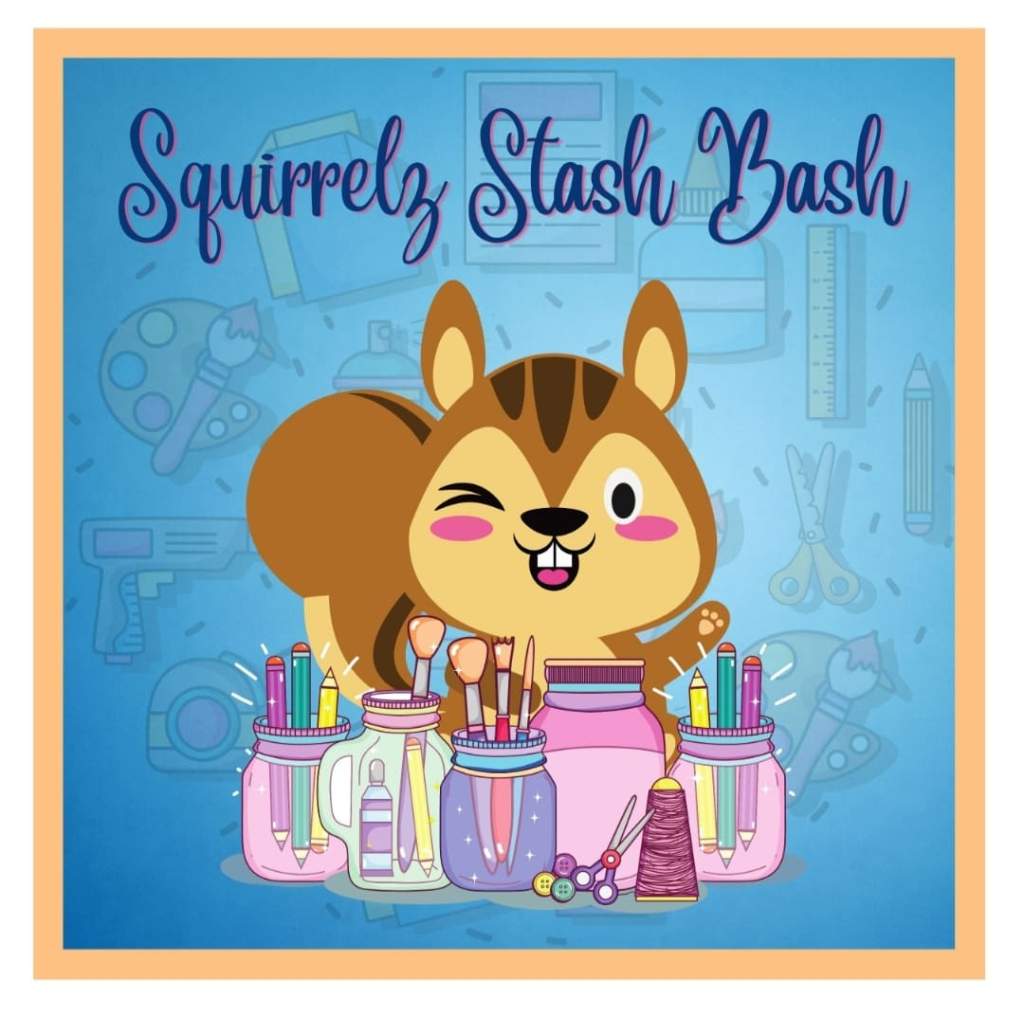
Welcome crafty friends! For those new here visiting from Marie’s amazing blog, I’m glad to have you here and hope you’ll consider subscribing! And for those who have been here before, I thank you for coming back each month to see what the Squirrel Squad have been up to! “The Squirrel Squad?” you say? Yes! We’re a handful of crafty gals who easily get distracted by squirrels and craft supplies… so much so that we have accumulated a hoard, er stash, of supplies that hardly get used before we’re on to the next supply. So we challenged ourselves to pick a new supply or technique each month, along with a theme or prompt, to see how we could use some of those neglected craft goodies! This month’s theme is Birthdays!!! I *love* to make birthday cards! And the technique this month is Interactive Cards, with a side challenge of using foil for extra points! (Not really, but when discussing how much foil we own, a couple of us wanted to challenge ourselves to apply foil (see what I did there?) to this theme as a supply suggestion.) Ok, so before I dazzle you with the shiny, foiled, interactive cards, let me give you the super short line up for this month:
- V Fairchild
- Anna Mahtani
- Marie Bingaman
- Karen Page – YOU ARE HERE
- Lounon and Bory are skipping this month
Formalities out of the way, lemme tell ya, this was a tough challenge for me!!! Interactive cards are always HARD for me… I don’t have the patience for fiddly projects. I thought I’d do a shaker card, cause that seemed like the easiest interactive card I could think of at the time. But even shaker cards are such a challenge for me to get everything lined up, keep stuff from sticking where I don’t want it to, keep the static from the acetate under control, etc. These cards look ok in the pictures, but I’m not at all happy with how wonky they are in real life. I ended up with 4 cards to share, but only because I kept messing up and then didn’t want to waste the pieces! Have a look:

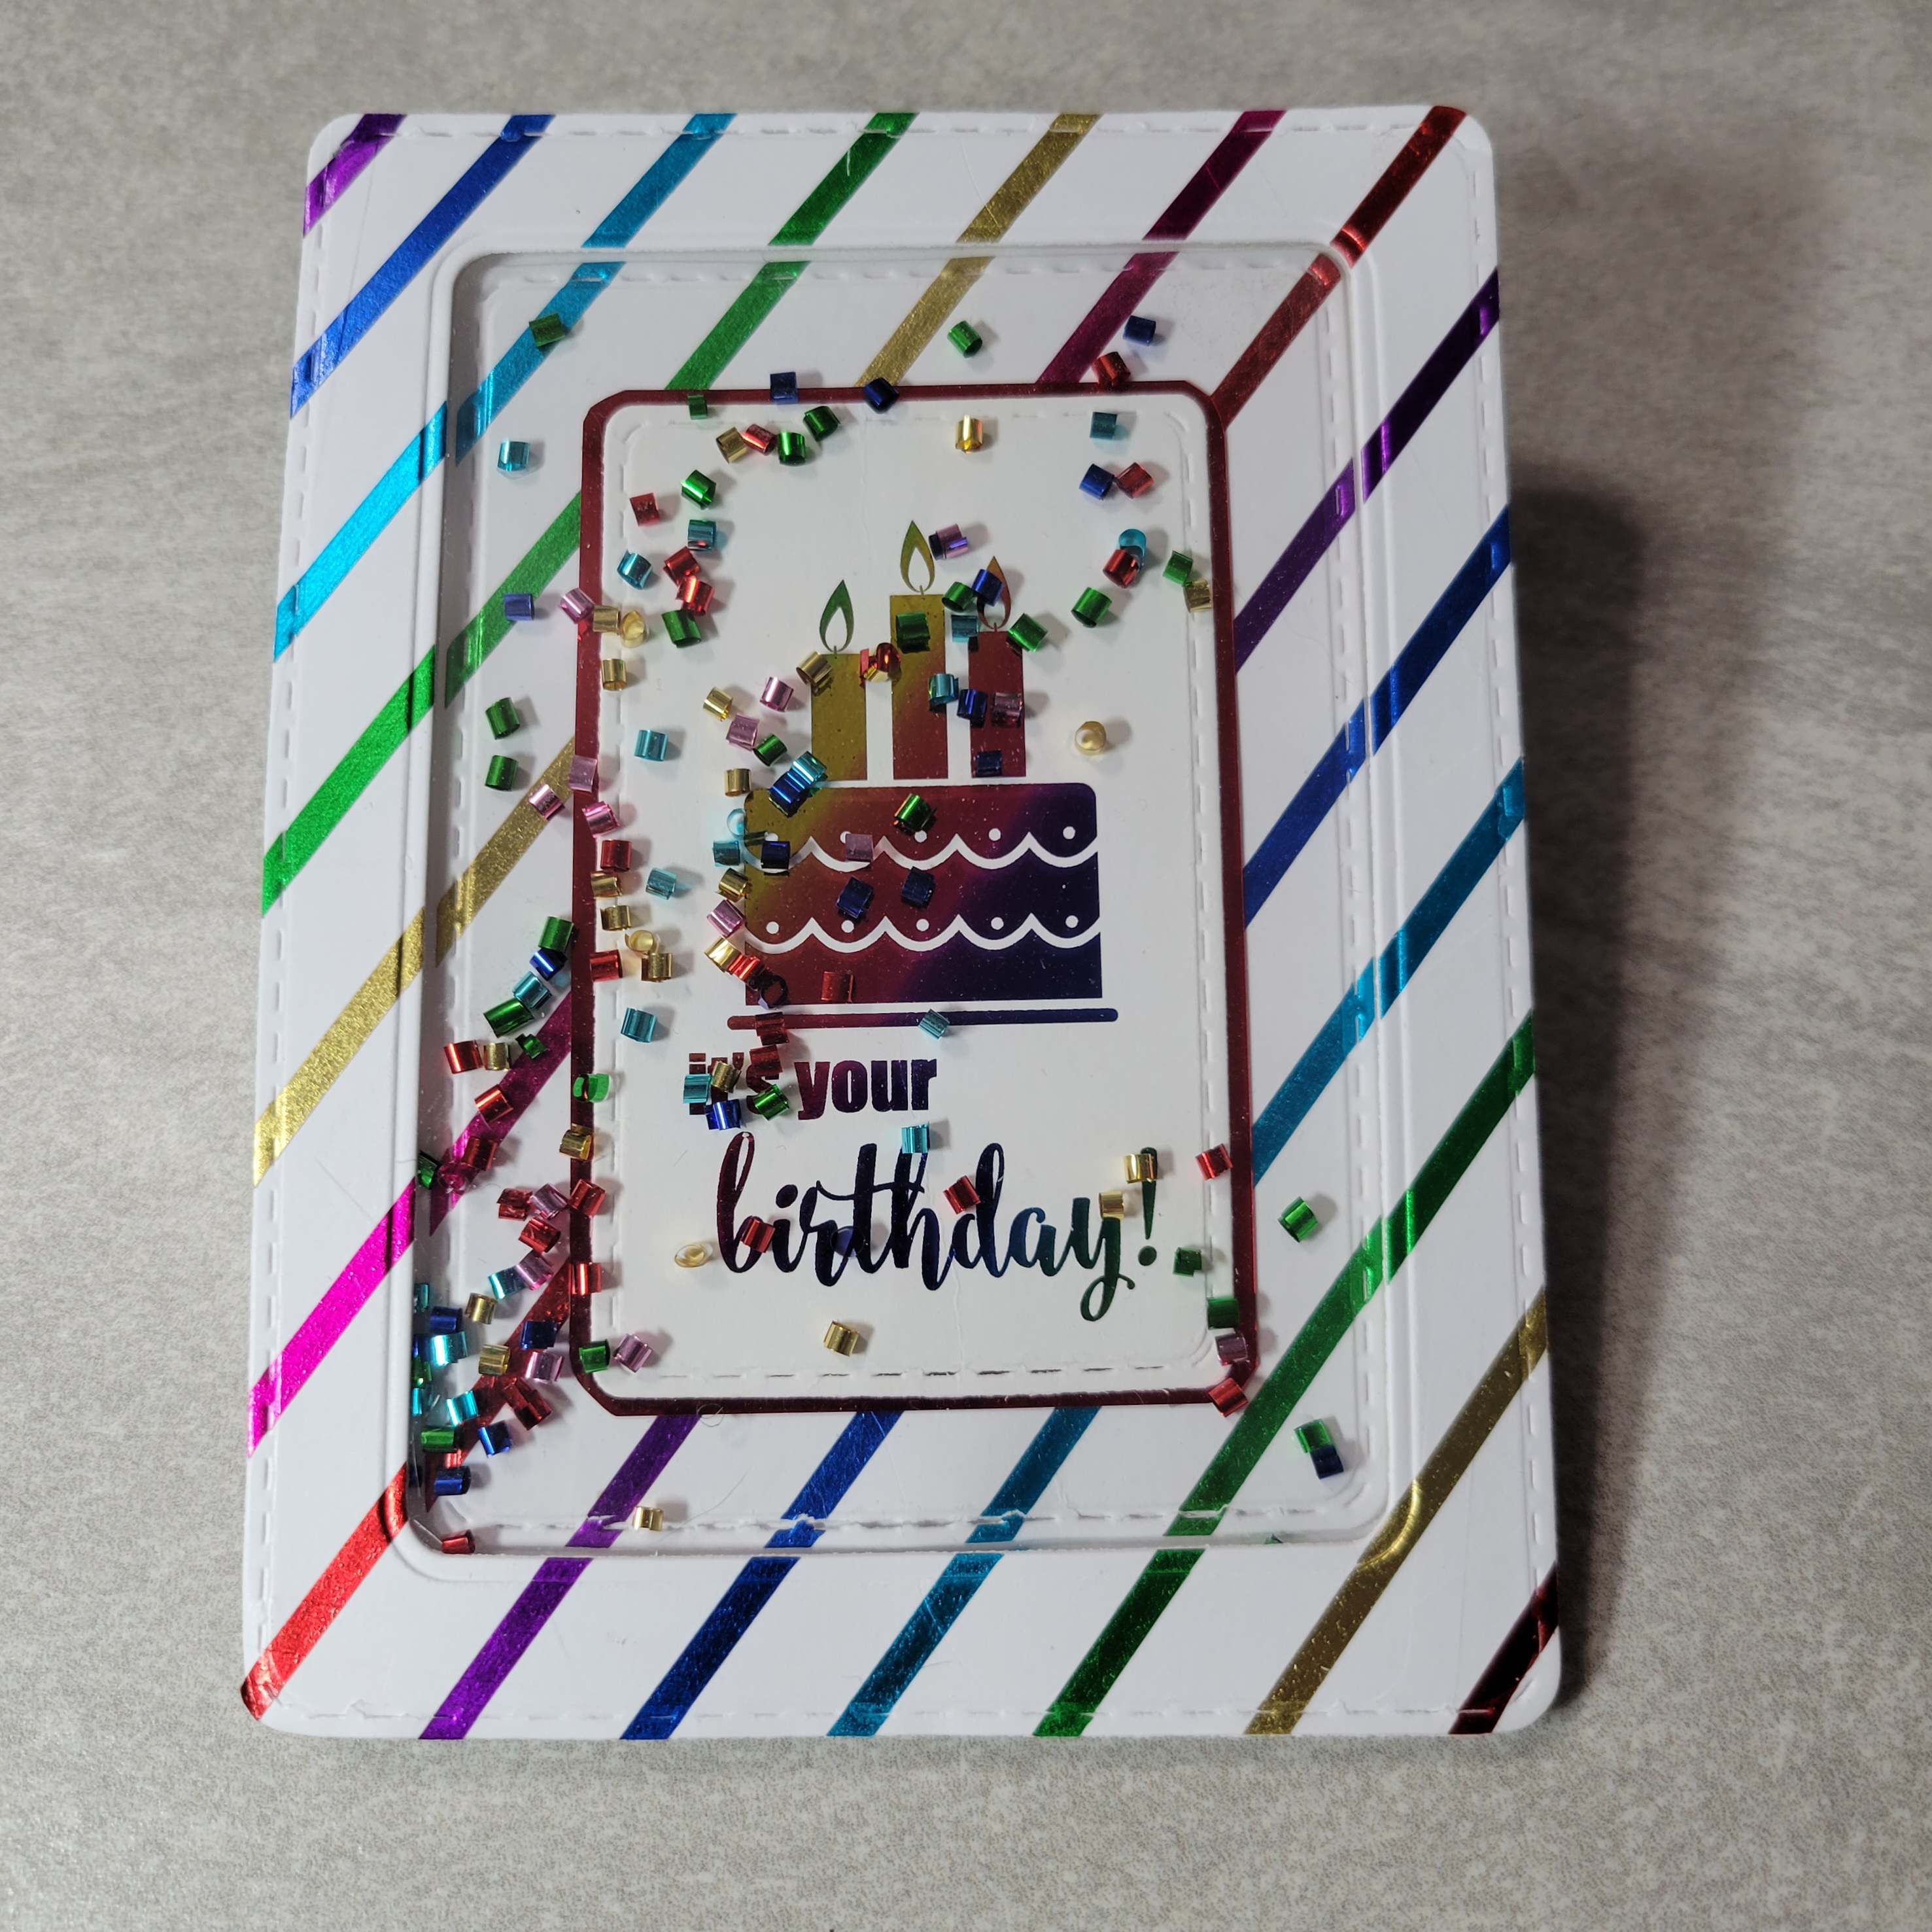
From the moment I decided on a shaker card and that I was taking the extra foil challenge (LOL: accidentally typed “fool challenge” which is actually still totally accurate), I knew I wanted to make a card with this toner sheet card front from Gina K Designs. Years (and years) ago I HAD to have these toner sheets… birthday, Christmas, backgrounds… I have a BUNCH. Out of 9 packs I’ve previously only used maybe 4 individual sheets from 2 packs, and this is my first from any of the birthday packs. These 2 came together easier than I thought they would:

To make the shaker card version, I die cut the toner sentiment with an oval die and foiled it, then used a smaller oval die to make the aperture in the card front piece. The shaker bits in all of today’s cards are tiny foil cylinders in rainbow colors, a score from Dollar Tree several years ago. These foil pieces multiply when you use them… you take a pinch out and somehow the container is more full than it was before you opened it! And while they give a fun look, they can be obnoxious little buggers that spring across the room when you just look at them and they leap into any exposed foam tape if you make the mistake of breathing. There was a fair amount of cussing during the making of these cards! LOL However, after getting the card assembled, I had fun coloring clear foil epoxy dots with alcohol markers to match the foil colors. I love how these 2 cards turned out and they are the least wonky of the set. Here are hopefully better pics, but the angles may be unusual because its even harder to take pics of shiny cards than it is to make shaker cards with festive but evil foil shaker bits!

I was able to foil the sentiment (from another GKD pack) in the middle of the Rainbow Shattered Glass foil sheet used for the card front piece, and I couldn’t help but use the negative to make another card (albeit not interactive, but stunning IRL if I do say so myself) using a sheet of full toner paper from Deco Foil.

These next 2 cards started out really fun. I have a set of foil washi tapes from Hobby Lobby that have virtually never been used despite being in the craft room at least 5 years. I was pleasantly surprised to discover that their adhesive was still good as washi is known to have a limited life span. I envisioned a set of 2 cards, 1 black and 1 white, but all the toner sentiments in my GKD packs were on white paper, so I resigned myself to make just the 1 card… until I die cut the sentiment wonky and opted to make another to replace it. But then when I was constructing the card I accidentally used the wonky version. 🤦♀️ So I made another striped card front and decided to play around with the size of the shaker window to make the 2nd card different. All the pieces were die cut with a stitched rounded rectangle die set from Pink and Main. I used the largest die to make a card front and card back, scoring the back piece 1/4″ and using Scor-tape on the flap to attach it to the card front. Sadly, I couldn’t get the shaker parts lined up well, so I ended up having to trim the pieces I die cut for the card base because both are so wonky! See:

Oy! And the static!!! I dusted the acetate with my powder tool and carefully wiped out the extra powder with a microfiber cloth, and still the static was unbelievable! I know the static will fade in time as the paper absorbs humidity from the air, but it was just an extra level of frustration dealing with the foil shaker bits. I will say that I took the time to glue a handful of the foil cylinders so that when the shaker bits finally settle to the bottom, some will always stay where I wanted them. I prefer the version with the larger shaker area better, but the one with the smaller window and larger frame was easier to put together. I like them both despite their wonkiness and would still love to play around with the foil washi on black cardstock sometime. It was actually enjoyable to add the foiled washi stripes using my Misti grid to keep them fairly straight… it was just the shaker aspect that drove me crazy! (Correction: crazier) Anyway, the sentiments were foiled this time with a regular rainbow (not the Shattered Glass) foil from Deco Foil, which totally matched the washi colors in a stoke of luck. Here’s a closer look:

Phew! If you hung in there with me this far, I appreciate you putting up with all my whining! 😄 I’m actually glad to have the chance to play with the foil and laminator, and to use up some of those shaker bits. I really enjoyed foiling the toner pieces and hope they don’t get buried again not to see the light of day for years. And for those of you who are just scanning the pictures (I’m looking at you, Sharon 😉), your next stop on the hop is ever entertaining V Fairchild of Passions and Distractions and I am sure she will inspire you to find ways to make interactive cards with whatever you have in your stash! I know she always inspires me, so make sure you go see what she made, then hop on to Anna and Marie if you haven’t already!
Thank you again for dropping by! Leave me a comment and let me know if shaker bits or making shaker cards make you cuss too! 😅 I greatly appreciate when folks take the time to leave a message so I know I’m not just talking to myself here!!! LOL,,, let’s be real, I talk to myself all the time. Why would this be any different?!? Ha! See you next month for another installment of Squirrelz Stash Bash!


[…] Karen […]
LikeLike
They look awesome Karen ! And you made me smile with your sequins and shaker filler problems I can definitely relate ! And for the “wonky” problem, lately, when I make shaker cards, most of the time I don’t use foam but I die cut the shape of my shaker multiple times onto oats or cereal boxes (4/5 times) and glued them together. It has a cleaner look and it sturdier 😉
LikeLike
Once upon a time I did that too… but I craft so infrequently I am forgetting things I used to know, tricks and time savers I used when I was crafting every day. I feel like such a rookie these days! After the first card, I was like “there has got to be a better way” but I was pressed for time so I didn’t to give it more thought. Instead I blamed my hands, my procrastination, my dislike of the technique in general. I know my situation isn’t going to change anytime soon, but maybe I learned enough from the mistakes made here to make myself watch a couple videos to refresh my memory on techniques I *think* I still remember but probably don’t. I was honestly proud of myself for remembering to use the stamp positioner corner to try to line the panels up, but even that didn’t work as expected. I did come to the conclusion that I should not keep foam tape that is nearly impossible to remove the backing tape from, trying to “use it up” when it only ruins my mood *and* potentially my projects too. Any suggestions for a brand that is easy to peel and cut? Oh, and thanks for the sweet comment!
LikeLike
These came out amazing and so super shiny! I love them all! And I love how you used all the parts! Negatives, wonky bits, everything. And I hear you on the cussing and carrying on for shaker cards. I can only imagine how stressful those tubes are (though they look super!). Amazing work as always!!!
LikeLike
Thanks V! Yeah, mental note to myself… maybe save those tubes for projects made during the humid months and not the months where we’re running the heat and literally everything is staticky! Not sure even that would help. Picture this… Dave walks into the bathroom to find out why the shower has been running so long, only to find me making a card on the vanity… and without saying a word, just shakes his head, turns and leaves 🤣 No, I’m taking a tip from you and using cardstock pieces for my shaker bits! 😁😁😁
LikeLike
hey
Good post
Great post! Your cards turned out so fun and colorful, despite the challenges you faced. I love the idea of using neglected craft supplies to create something new, and your use of foil and interactive elements really make these cards stand out. Thanks for sharing your creative process and inspiring others to play with their own stash of supplies!
Cheers!
Scott Dubois
Civic Edge Lifestyle
LikeLike
You really took the additional foil challenge to heart! Shiny foil everywhere!! 😁😂😁😂😁😂 As usual, I think all of your cards are fabulous, despite any alleged wonkiness. 😁
LikeLike
Alleged 🤣 Guess I gotta mail you one so you can be like, “So she *was* right. This looks like crap IRL!” 😂 Thank you though for boosting my ego!
LikeLike
Dang, I thought I commented already, but I don’t see it! ANYWAY, your card are fabulous in all their shiny, rainbow-y glory! I have to admit, my favorite one is the non-interactive one. SO PRETTY!!!! 🙂
LikeLike
My bad on the comment… its there now that I approved it! I gotta admit I like the non-interactive better too! Thanks girl! You know I always appreciate your kind words so much!!!
LikeLike
These are wonderful!! I love all the foiling you did!! The negative of the first card you made came out so stunning!! If you decide to send it out, you know my address, wink wink! 😉
LikeLike