
Welcome to the latest installment of the Squirrels Gone Nutz hops where we use supplies we’ve squirreled away, and follow a monthly theme prompt as well as a specific technique or supply. This month the prompt was Elegant and the technique we’re all using is Marbling. There are several techniques that offer results you would call marbling. Many involve using shaving cream and liquid inks (alcohol, dye reinkers) or pigments (paints, powdered pigments) or even a combo of nail polish and water. I’m sure there are even more ways to obtain the results… and to be fair to everyone who may not have these supplies, we included using marble papers and stamps. I have wanted to try marbling for ages so I set off to create backgrounds with shaving cream and paints. Before I get into the details, let me give you the full hop lineup cause you will *not* want to miss the gorgeous projects the rest of the girls put together for you!!! You should have arrived here from the incredible Marie Bingaman, and next up is the amazing Lounon Riviere.
- Bory Yankova
- Marie Bingaman
- Natasha Davies – taking this month off
- Karen Page – YOU ARE HERE
- Lounon Riviere
- V Fairchild
- Anna Mahtani
Here’s a quick look at the cards I made for this prompt:
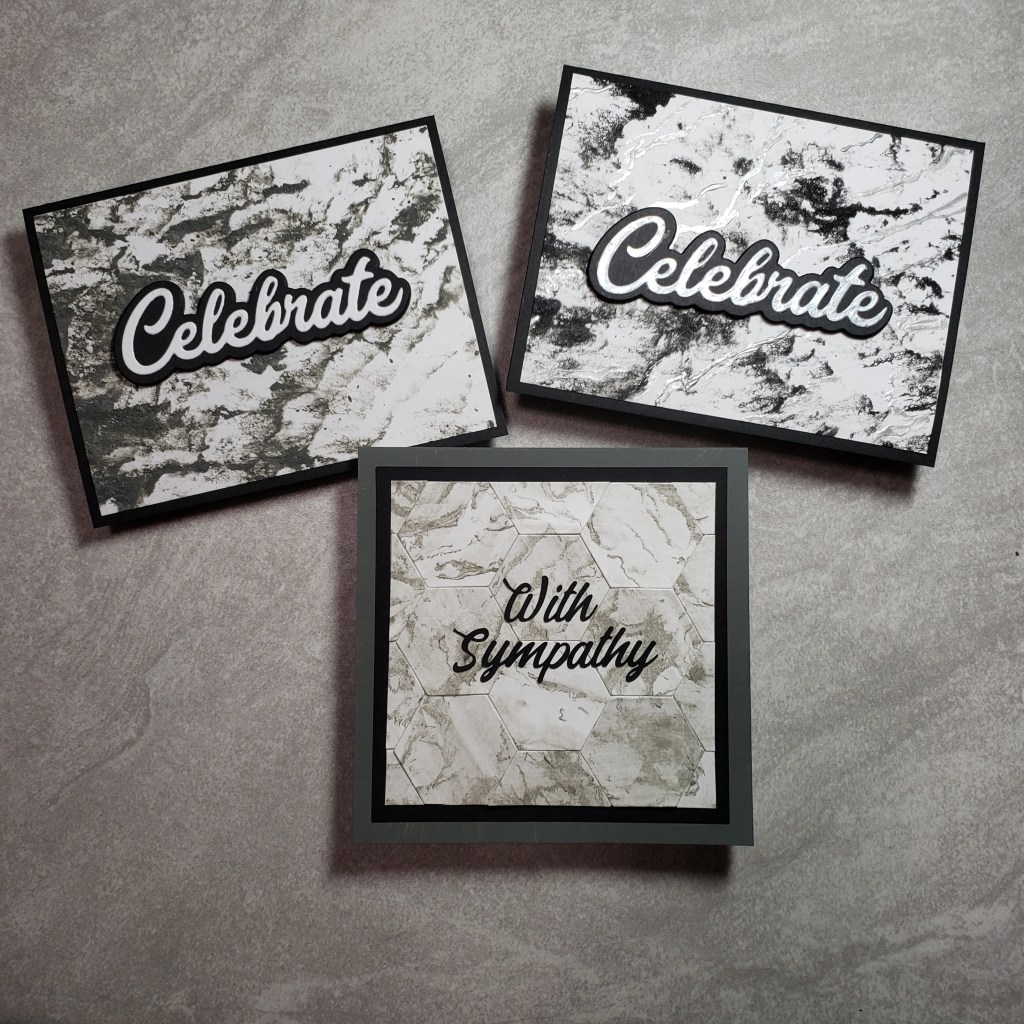
To create the marble look, I used a small bin and squirted lines of shaving gel in the bottom, and allowed it time to foam up and spread out. Then I randomly squirted some charcoal gray paint in squiggles over the foam. I then dragged the handle end of a paintbrush through the paint and foam, back and forth but not mixing it completely. I placed a card panel made from Bristol smooth paper on top of the foam and pressed it all over the back to ensure that it was making contact with the paint and foam to make a ‘print’. I made several prints or backgrounds from this one paint application. The first I pulled directly off the foam, straight up. The others I sort of slid off, giving it a streaky look which I liked. This process leaves quite a bit of the shaving foam still on the paper, so on 3 I promptly wiped the panels with a baby wipe. On these, the paint shade was not nearly as dark and true as the actual paint color. I left 1 overnight to dry hoping the paint would stain the paper better and the color would be more bold. Even letting it dry overnight did not help the paint remain its true color. I used one of the lighter panels to create a tile look by die cutting it repeatedly with a hexagon die from Spellbinders Nested Hexagon dies. I rotated the hexagons to randomize the pattern. I attached the die cuts to a piece of printer paper and then cut it down to a square. I matted that on black and when I realized I didn’t have a proper gray cardstock to match I decided to just use the gray paint on the edges of a white 5×5″ square card base for the perfect match. I used my Silhouette to create the sentiment with a font on my computer, and this card is done. Here is a closer look at it:

The 4th panel I made with the gray paint was left to dry overnight, and I expected to have to wipe the shaving cream off the panel like the others. Instead, it dried hard like a texture paste, and in the true shade of the paint used, which was a bonus. Not wanting to mess it up at this point, I just die cut a sentiment to add to it using the Celebrate 2 layer die from Pink and Main, and cut it from black and white cardstocks. I also cut the shadow layer from fun foam to give the sentiment dimension. Have a look at it here:

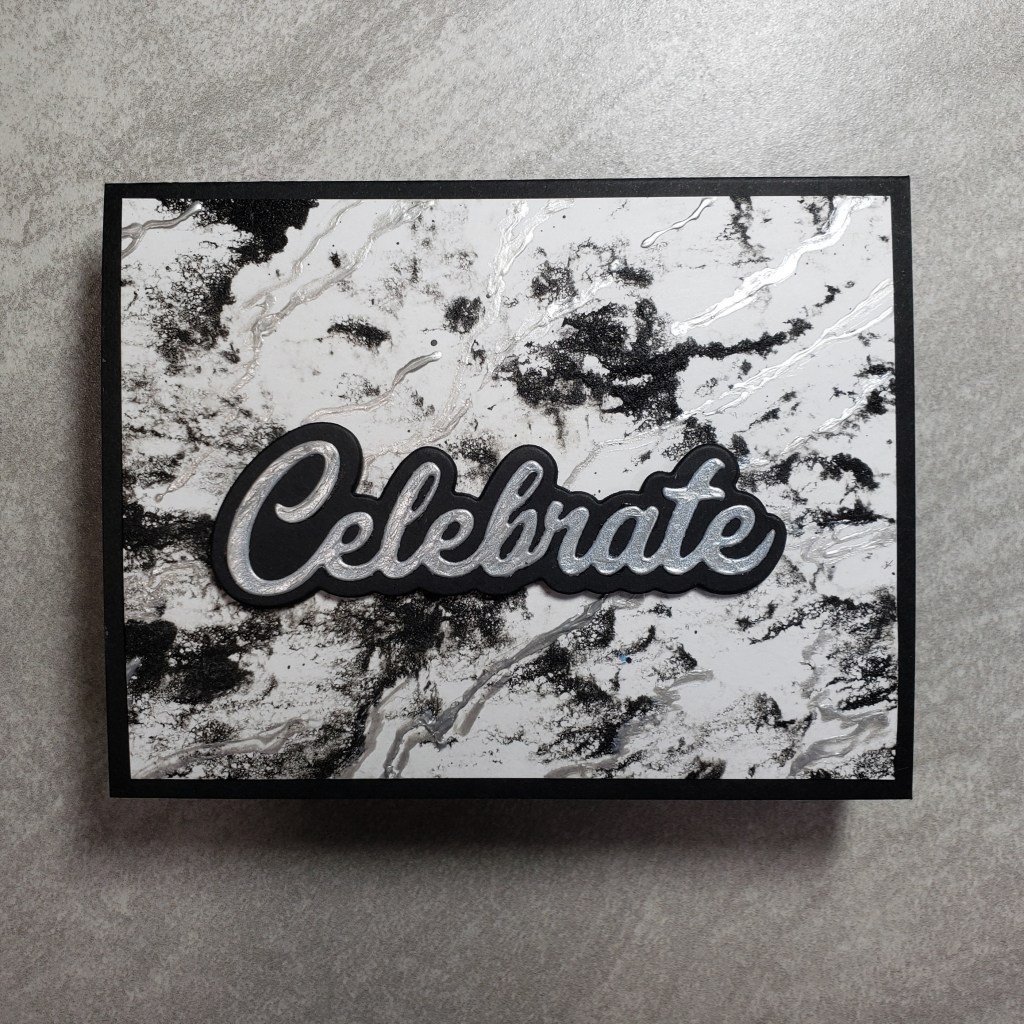
Now, I *really* wanted my marble to be darker, and have some metallic veining in it, so I experimented with black paint… and trying different ways to add shine: foil and a glue pen, Stickles glitter glue, and Nuvo drops. The foil worked really well, but I thought it was actually *too* shiny and distracted from the marble background. The Stickles was just too glittery. But the Nuvo drops in silver were juuuuust right! I could apply it thick for a concentrated line of silver, or spread it out as I applied it for a shimmery and wispy look. I trimmed down my card panel to fit an A2 sized card, then die cut another 2 layer celebrate sentiment die, this time from back cardstock and silver glimmer paper. The silver wasn’t a good match though to the Nuvo silver, so I just covered it with more of the same Nuvo drops and then it matched perfectly! I really like the texture it adds too! Its almost like I used gilding flakes on it. This card also got a shadow layer from fun foam so I could pop up the sentiment, and that finished it off! This is my favorite of the bunch!!! Here’s another look at the final card:
That’s it for me! I actually had a fourth card in the works but ran out of time so you may see it (probably not… LOL) in the near future. I used an *actual* marble covered in copper paint to roll over a piece of cardstock, for a “marbled” yet not marbled background! It made a fun look of its own, though but perhaps not quite “elegant”. 😉 Be sure to head to Lounon’s blog next as I’m sure she found a way to put her creative spin on the prompt again this month!
I appreciate you dropping by and hope you have a great time hopping along today!!!


[…] you are hopping you should come from the blog of the inspiring Karen and after me, I invite you to hop to the blog of the super talented […]
LikeLike
[…] Karen Page […]
LikeLike
Oh!! STUNNING!! I love how your marbled backgrounds turned out and that extra detail with the silver nuvo drops – amazing! The first card with the hexagons, looks like marbled tiles, WOW!!
LikeLike
Aw, shucks! Thanks Anna! I really liked the tile concept and I hope to give that a go again soon.
LikeLike
I love them all Karen ! You nailed it ! I like you went with black / grey/ white and the three different techniques and results you got are so pretty ! So elegant !
LikeLike
I know marble can be done in any color, but I’m very partial to the traditional marble stone. I was surprised at how different they turned out. IRL they have such a cool feel too!
LikeLike
Wow, these cards are amazing, Karen! I bet the one with the hardened shaving cream is awesome to run your fingers over! You always describe your cards so well, my sister. Can I hire you to write my blog posts? 😉
LikeLike
These are beautiful and I love them! I am particularly obsessed with the hexagon tile card! Genius! I want to CASE that ASAP!!!! Thanks for sharing your leaning curves along the way!!!!
LikeLike
So sorry for the late comment! Your cards are just amazing, Karen! Love the marbled look, so soo pretty! Such a great idea to rotate the hexagons on the first card and the Nuvo drops on the third one seem to be the perfect match 🙂 And all are so elegant!
LikeLike